Last time, I posted the installation of GitLab. So, we have the Git…. what’s next?
A lot of people suggest CI – continuous integration. Thus, I’m going to talk about Jenkins in this post.
ASSUMPTION / PREREQUISITE:
- we have a BMCS subscription
- we already create a Linux VM or BM, have the VCN and Internet Gateway setup
We can put Jenkins in the same VM/BM as GitLab, or we can use another VM to run Jenkins.
Steps
- Similar to GitLab, the first step here is to get the Jenkins installation binary. We can navigate to Oracle Cloud Marketplace
https://cloudmarketplace.oracle.com/marketplace/en_US/listing/16132843
for details
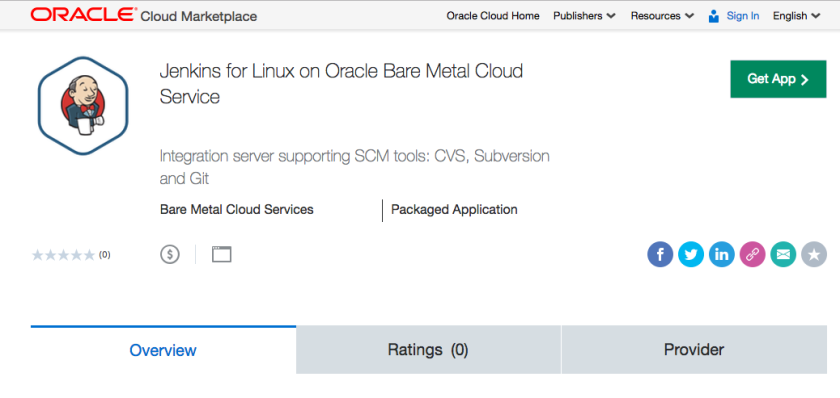
- Just click the [Get App>] button and follow the instruction. It will guide us throughout the Jenkins installation process.
- Actually, what we need to do is to ssh to the VM/BM to download and install Jenkins. In the VM/BM use wget to download Jenkins.

- The download will take a while. wait for the download to complete. Then change the file permission to so that we can run the installer.

- In our example, we will install Jenkins in the same VM/BM as GitLab. We will use non-privilliged port to run Jenkins and run it with oracle user.

- The installer will install Gradle along with Jenkins.
– Answer [Y] and press [Enter] when it ask for Gradle.
– Answer [Y] and press [Enter] when it ask you to confirm.

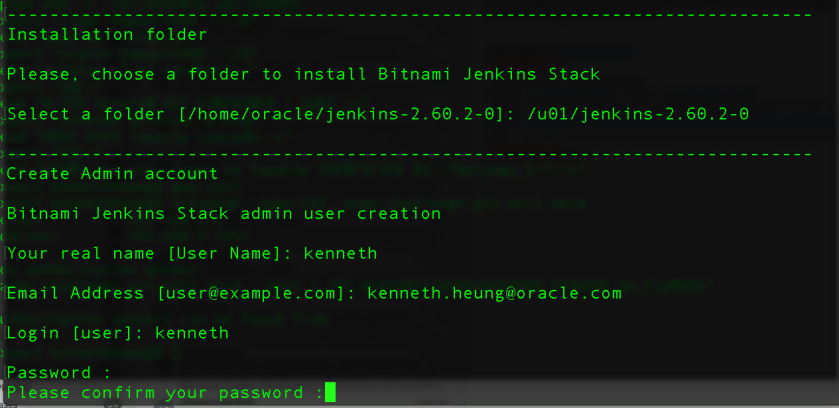
- Next, the installer will prompt you for installation folder. Enter your desired folder. In our example, we will put it under /u01

- Enter your desired Jenkins SUPER ADMINISTRATION username and password
- The installer will then ask you for Apache and Tomcat port to be used for Jenkins. You can just keep the default values.
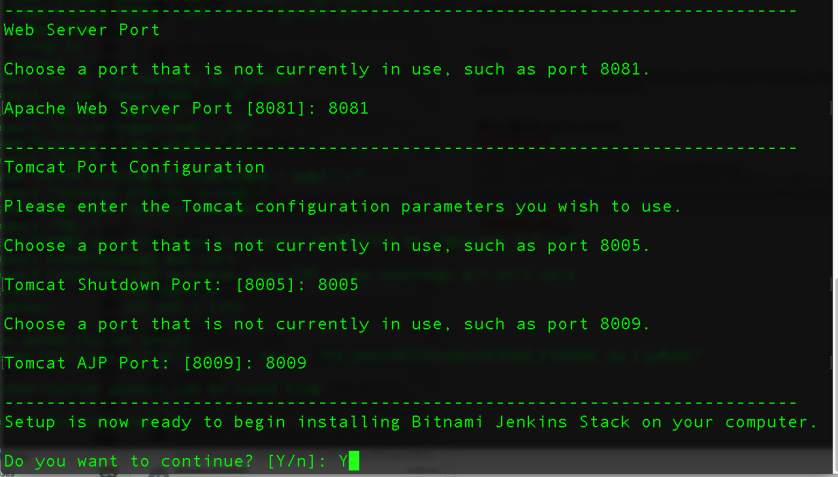
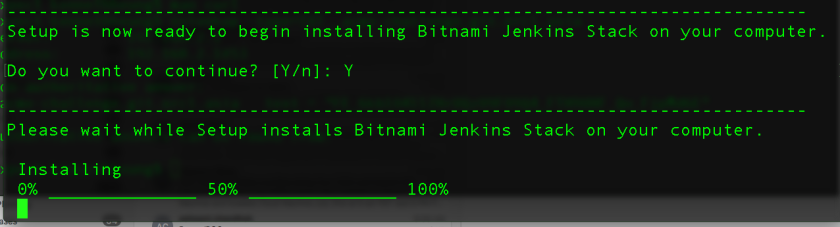
- Enter [Y] for the last confirmation and wait for the installation to complete.
- Jenkins should starts automatically after the installation.
How to start / stop / restart Jenkins
Just navigate to the target folder and use the ctlcscript, e.g.
[oracle@kmean jenkins-2.60.2-0]$ ./ctlscripts.sh start
or
[oracle@kmean jenkins-2.60.2-0]$ ./ctlscripts.sh stop

How to access / navigate / login to Jenkins
It is simple, just use a browser and go to
http://your-vm-bm-ip-fqdn:apache-port/
e.g. http://jenkins.mydomain.com:8080/
Click the [Access Jenkins] link and login with the username/password we’ve entered during installation.
