Got a question from my sales colleague whether DevCS supports SonarQube. The quick answer is “yes” and I’m going to briefly describe how to do it. I’m going to create a SonarQube VM via Bitnami in OCI Classic and scan the spring-boot example during the maven build process.
Part A – SonarQube
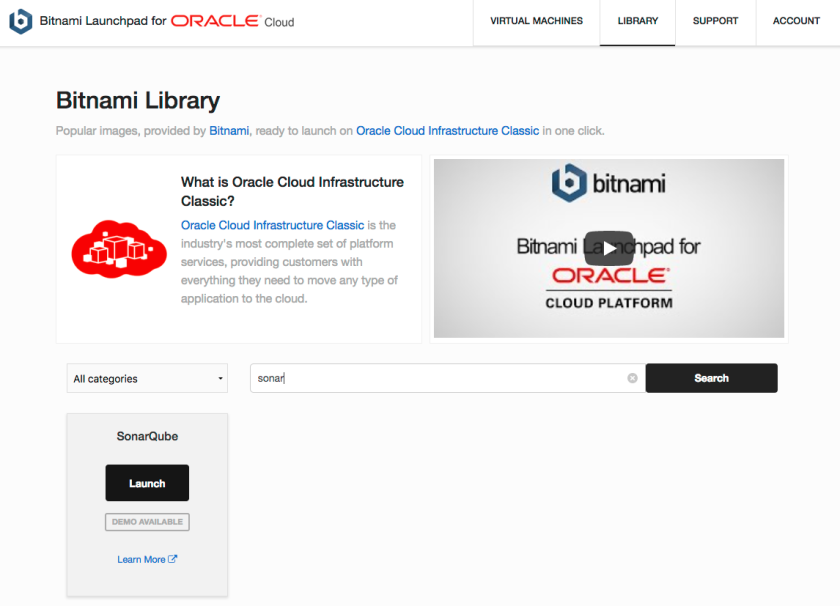
- The first step is the create the SonarQube VM in OCI Classic. Just like what we’ve talk about previously, we can use the Bitnami portal to provision the VM. Login to Bitnami and navigate to the Launchpad for Oracle Cloud.
Go to the Library tab and search for SonarQube. Click the Lauch button to create the VM.
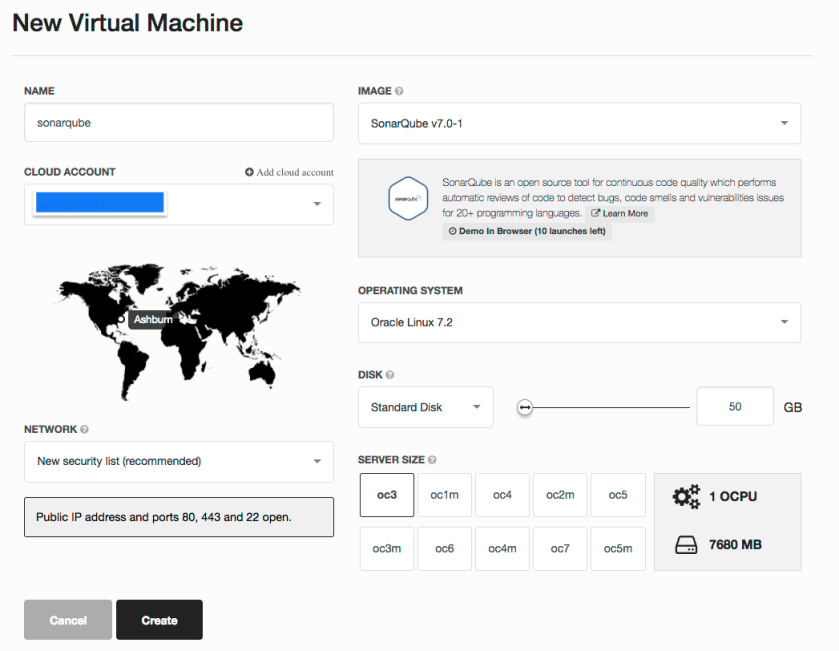
- Pick the corresponding OCI Classic Cloud Account, please refer the previous post about the details of setting up Cloud Account in Bitnami. Choose the desired disk size and server size. In this example, we will use Oracle Linux as the OS of the VM. When ready, just click to Create button.
- Wait for a while for your VM to get provisioned. In the provision screen, you can get the login information (username/password) of SonarQube, as well as the SSH key to access the VM.
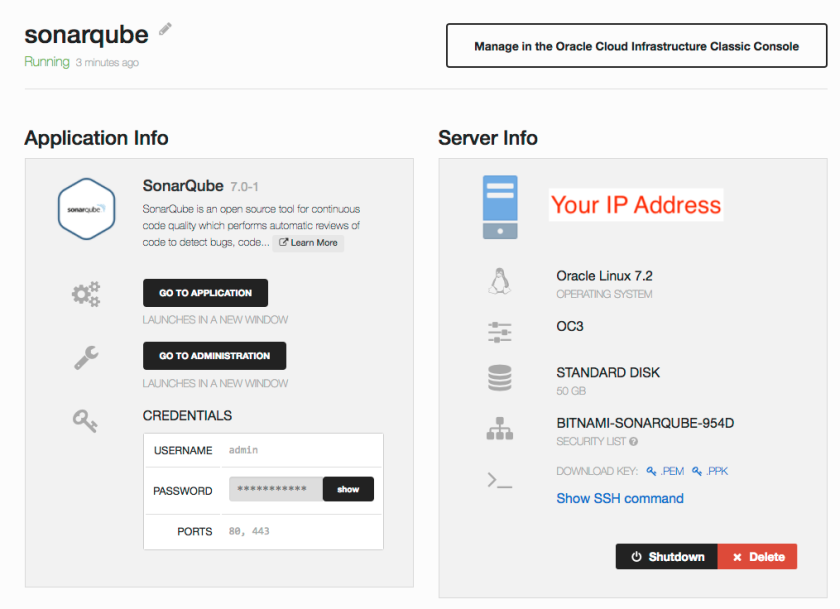
- Once SonarQube is ready, you can either
- click the [GO TO APPLICATION] button
- manually use a browser to navigate to http[s]://[ip-address-of-vm]
to access SonarQube (web interface).
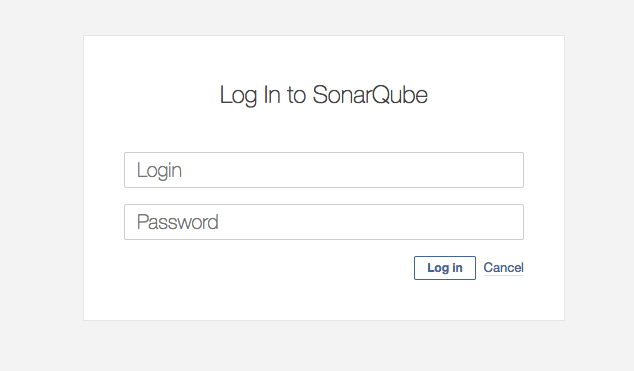
- Login SonarQube with credential you got in the previous step (i.e. default username is admin)
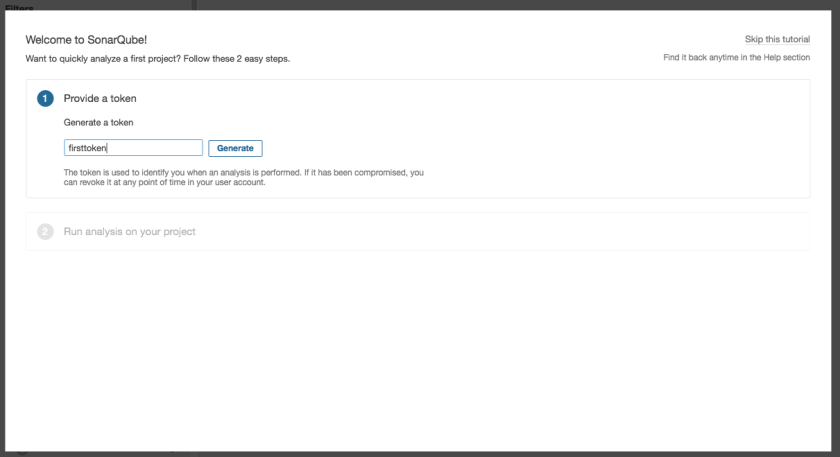
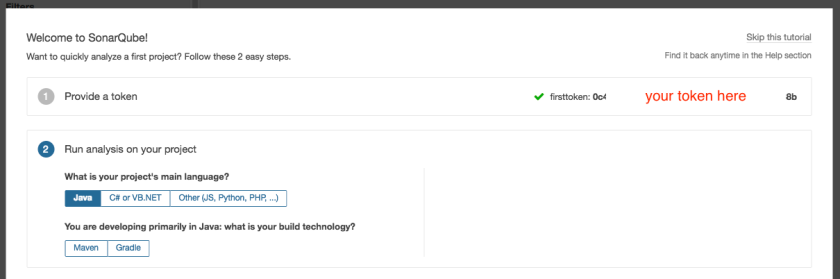
- The first time you access SonarQube, the tutorial / wizard will guide you through some initial steps. We will to create a token (for details of using SonarQube, you can visit their website).
Provide a name for the token and click [Generate]
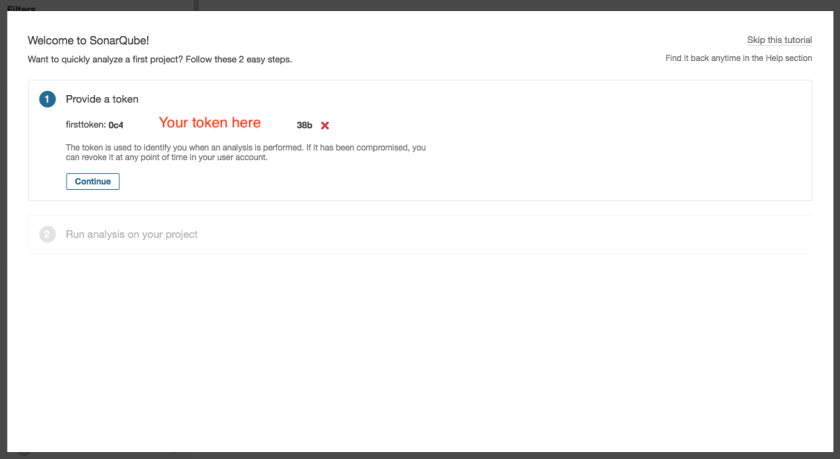
Copy the token value, as you will need it for your maven step. When ready, click [Continue]
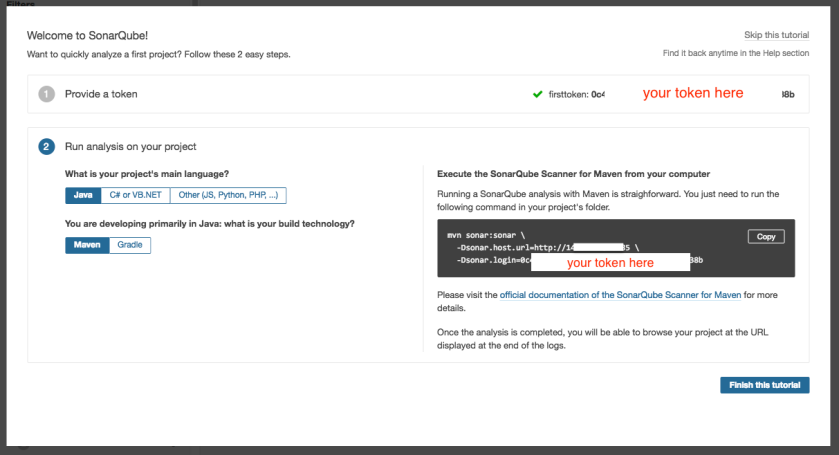
- It will then ask which programming language you need to scan. In our example, we will just click [Java].
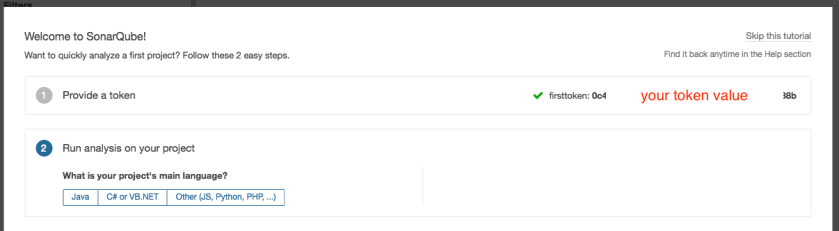
For Java, we can select whether we use maven or gradle for the build process. For our example, we will use maven.
The required mvn command will be displayed in the right hand side (you can also copy this command for future reference). Click [Finish this tutorial]
Part B – Developer Cloud
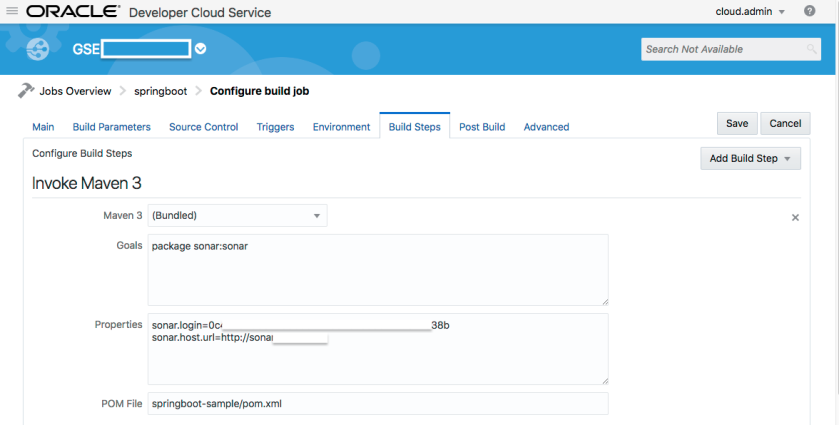
8. In our build job, we will need to add sonar:sonar as part of the maven goal. We will also need to provide the sonar server url and token we got in part A. When the build executes, this maven step will post the project source code to SonarQube for code scan.
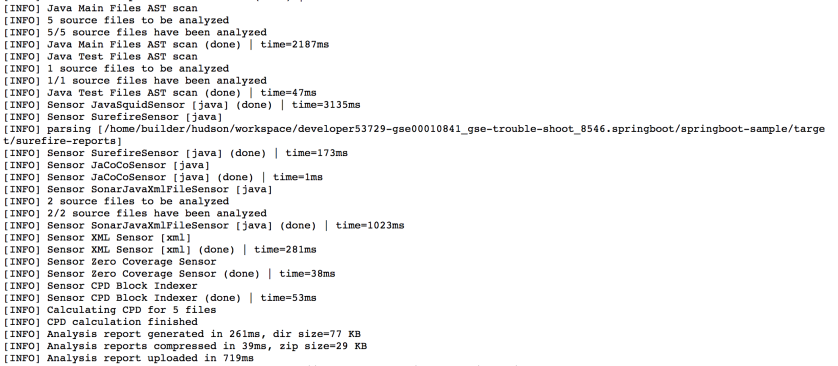
- Here comes the sample (console) output of the build step – the snippet of code being scanned.
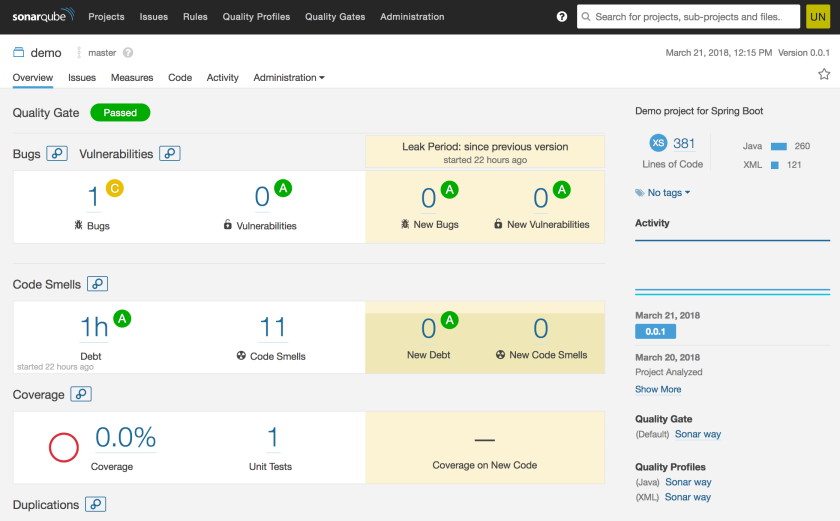
- You should be able to view the scan report in SonarQube