由公司免費俾考五科,到公司IT狗要人人考七科….
考吓考吓讀吓讀吓十吓十吓,變咗咁囉
Started with 5 free certs (as an option), suddenly became mandatory 7… and I ended up with 
Category: DevOps
DevCS adds docker, pipeline, dedicate build server supports
New version of DevCS got some nice new features
- supports dedicate build server(s)
- new pipeline and pipeline visualization
- docker builder
- integration with code scan / analysis
More details can be found in DevCS PM blog post
https://blogs.oracle.com/cloud-platform/oracle-developer-cloud-service-adds-docker,-pipelines,-and-more
and latest documentation
https://docs.oracle.com/en/cloud/paas/developer-cloud/csdwn/index.html
dotnet mvc on Oracle ACCS
In this article, I’m going to briefly walk through how to create and deploy a .net mvc sample app in Oracle Application Container Cloud Service.
Assumptions:
- you have an Oracle Cloud account, it can be the promotion trial account
- you have dotnet core installed on your local machine – I’m using dotnet 2.0.0 on MacOS
- you have the corresponding editor / tools, e.g. I’m using VS Code.
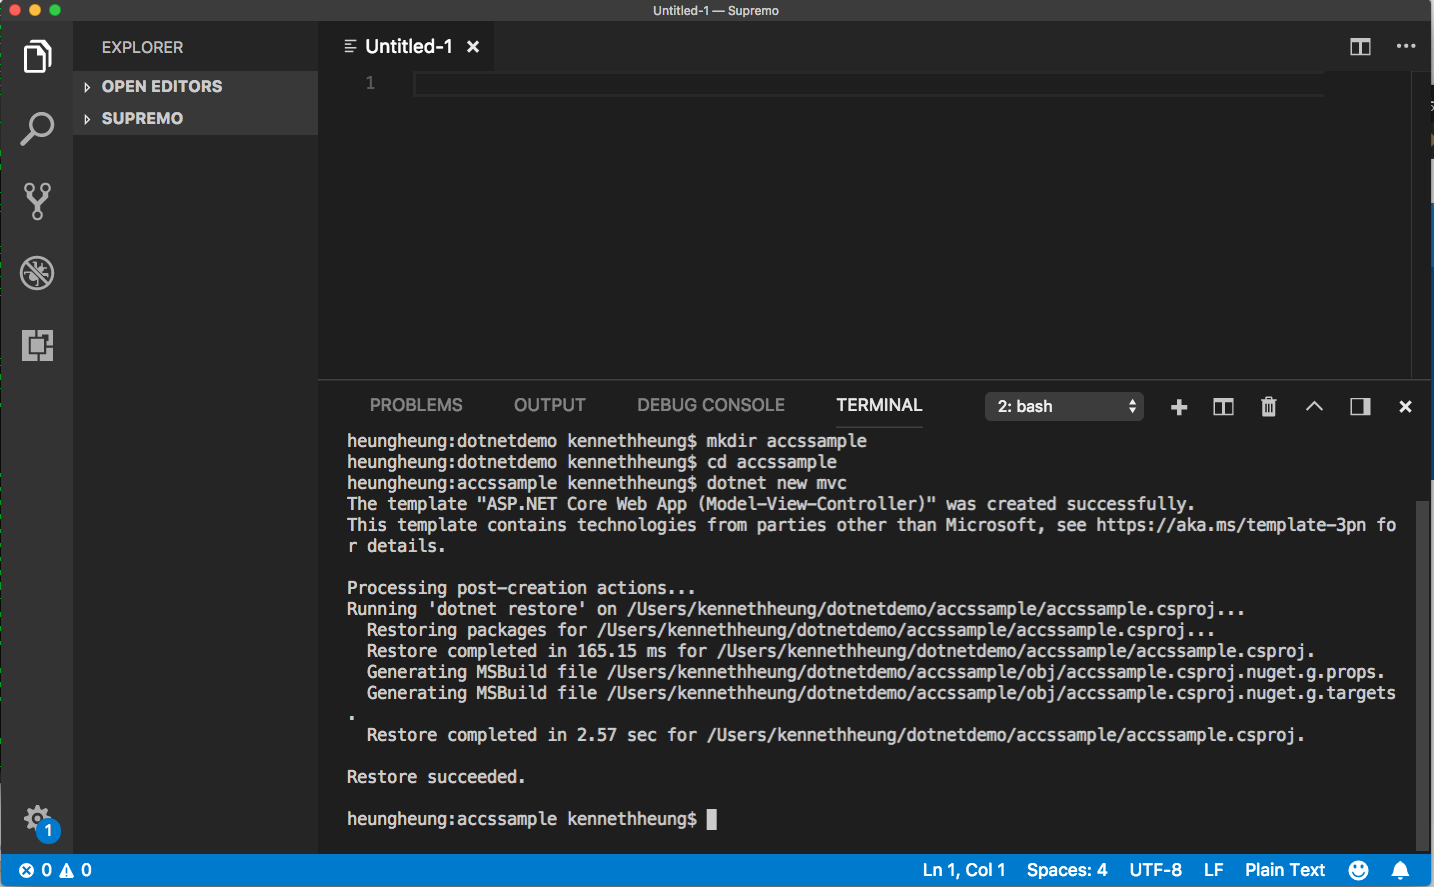
- Launch VS Code and open the embedded Terminal. Alternatively, you can also use your favorite editor and/or the OS Terminal (in Windows, that will be the Command Window).
-
Create and goto (mkdir/cd) your desire folder and create the mvc project – I will call the project accssample:
mkdir accssample
cd accssample
dotnet new mvc
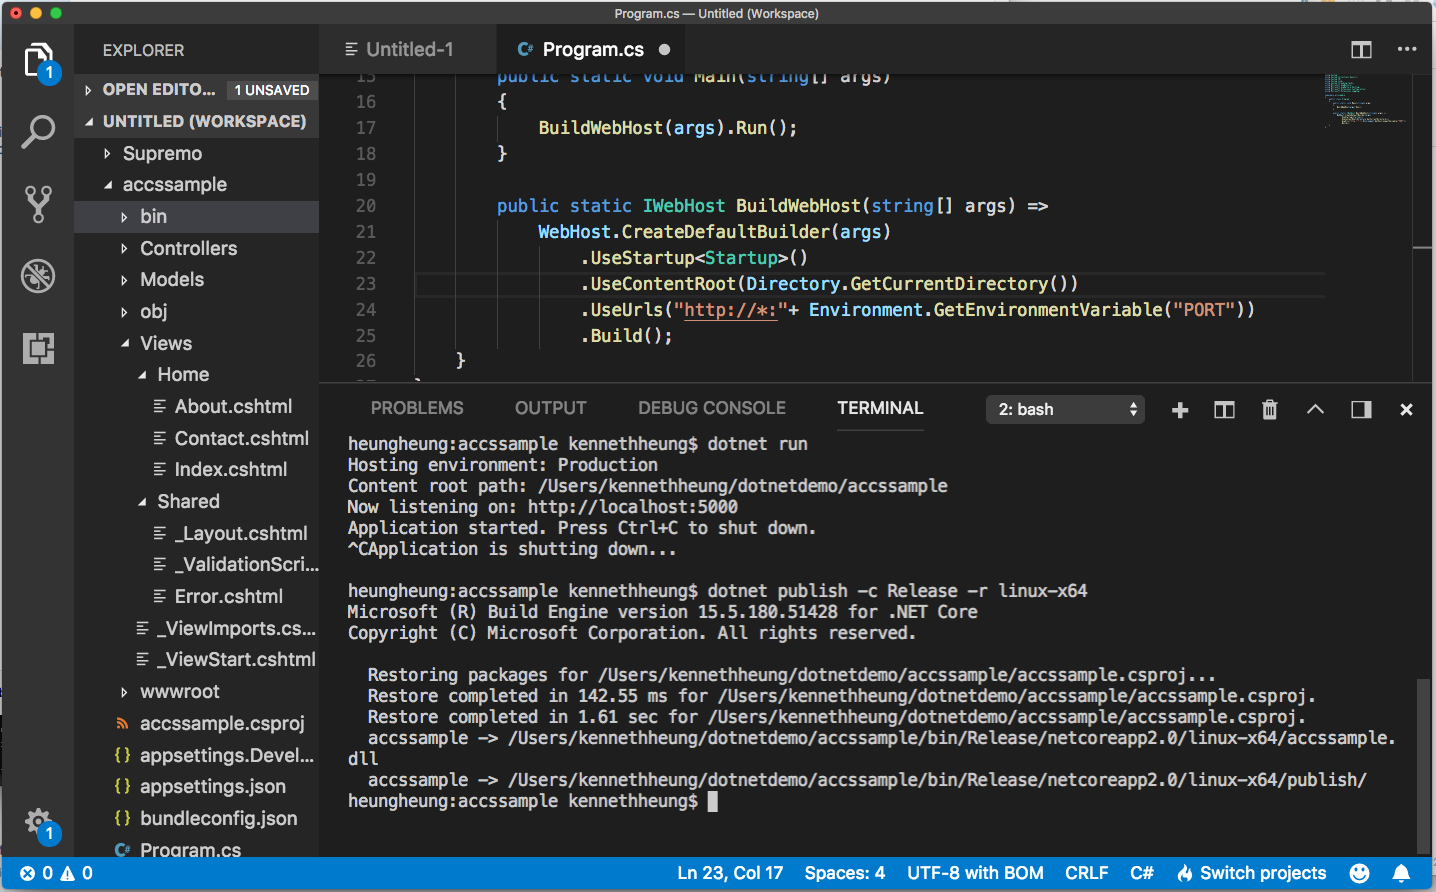
- Open Program.cs file of the project, add .UseContextRoot( ) and .UseUrls( ) in the CreateDefaultBuilder
.UseContentRoot(Directory.GetCurrentDirectory())

.UseUrls("http://*:"+ Environment.GetEnvironmentVariable("PORT"))
Your program will looks like this
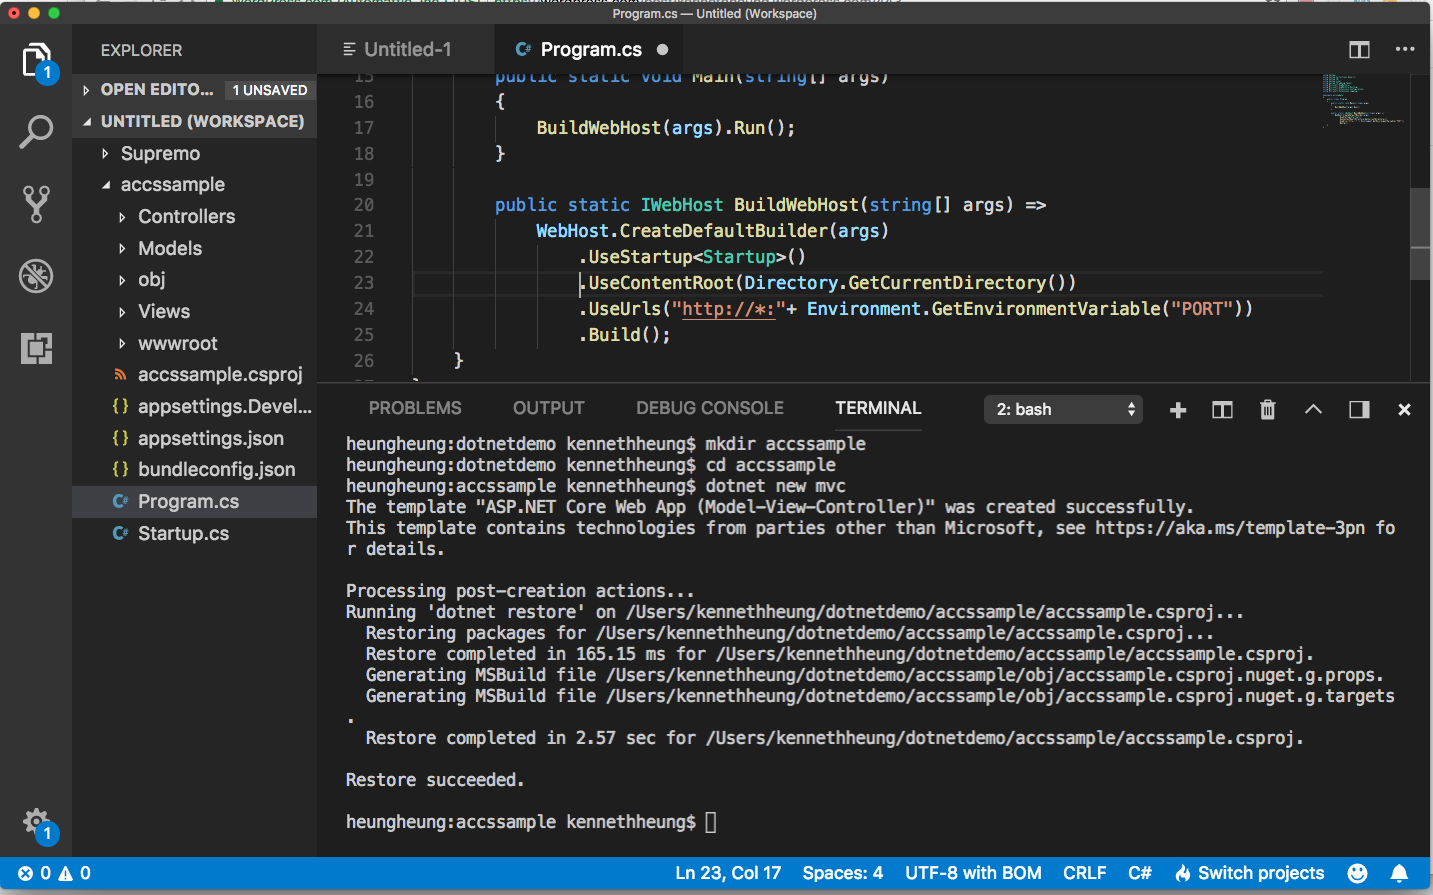
Remember to save the changes.
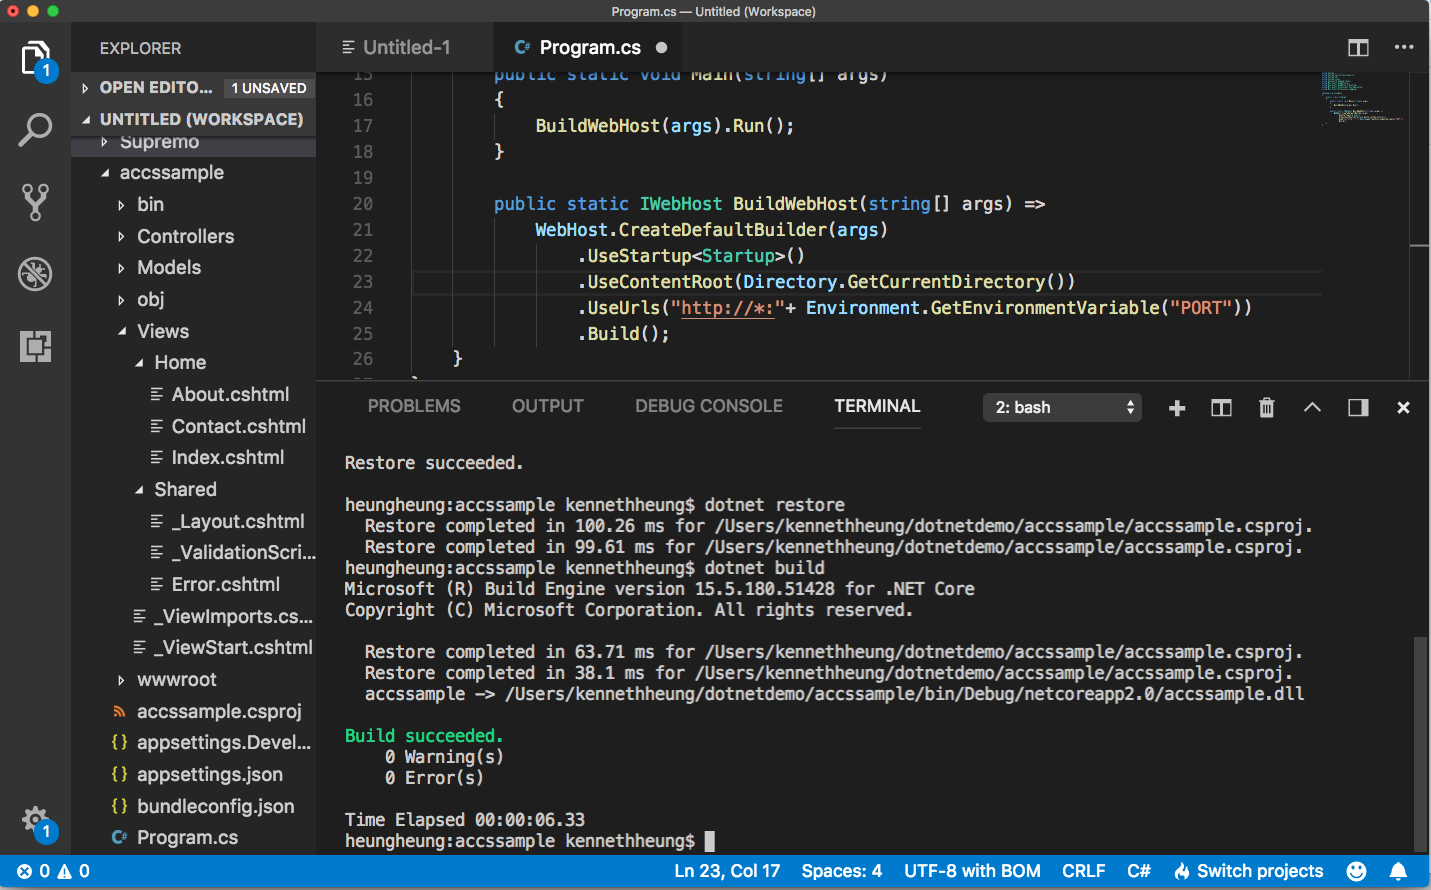
- Use the terminal to update the project dependencies and create a debug build for local testing.
dotnet restore
dotnet build
- Test the program locally
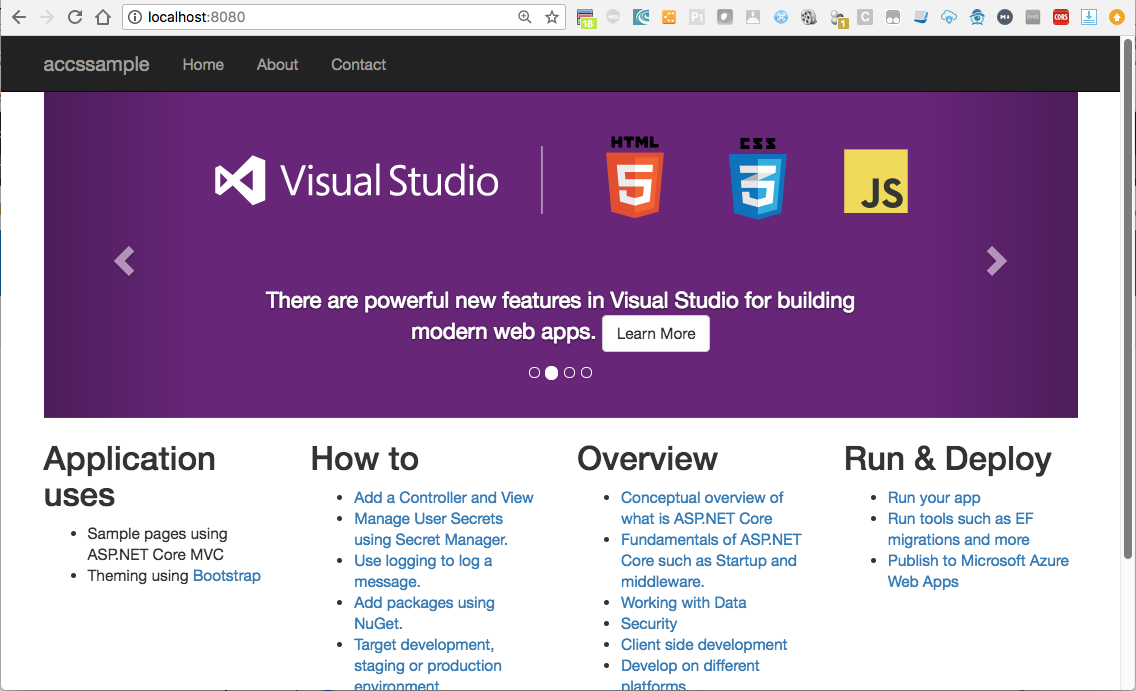
export PORT=8080
dotnet run

Open a browser and navigate to http://localhost:8080 to test the app locally
- Once we are happy with the app, we can create the release build. We will need to publish to Linux release for ACCS.
dotnet publish -c Release -r linux-x64
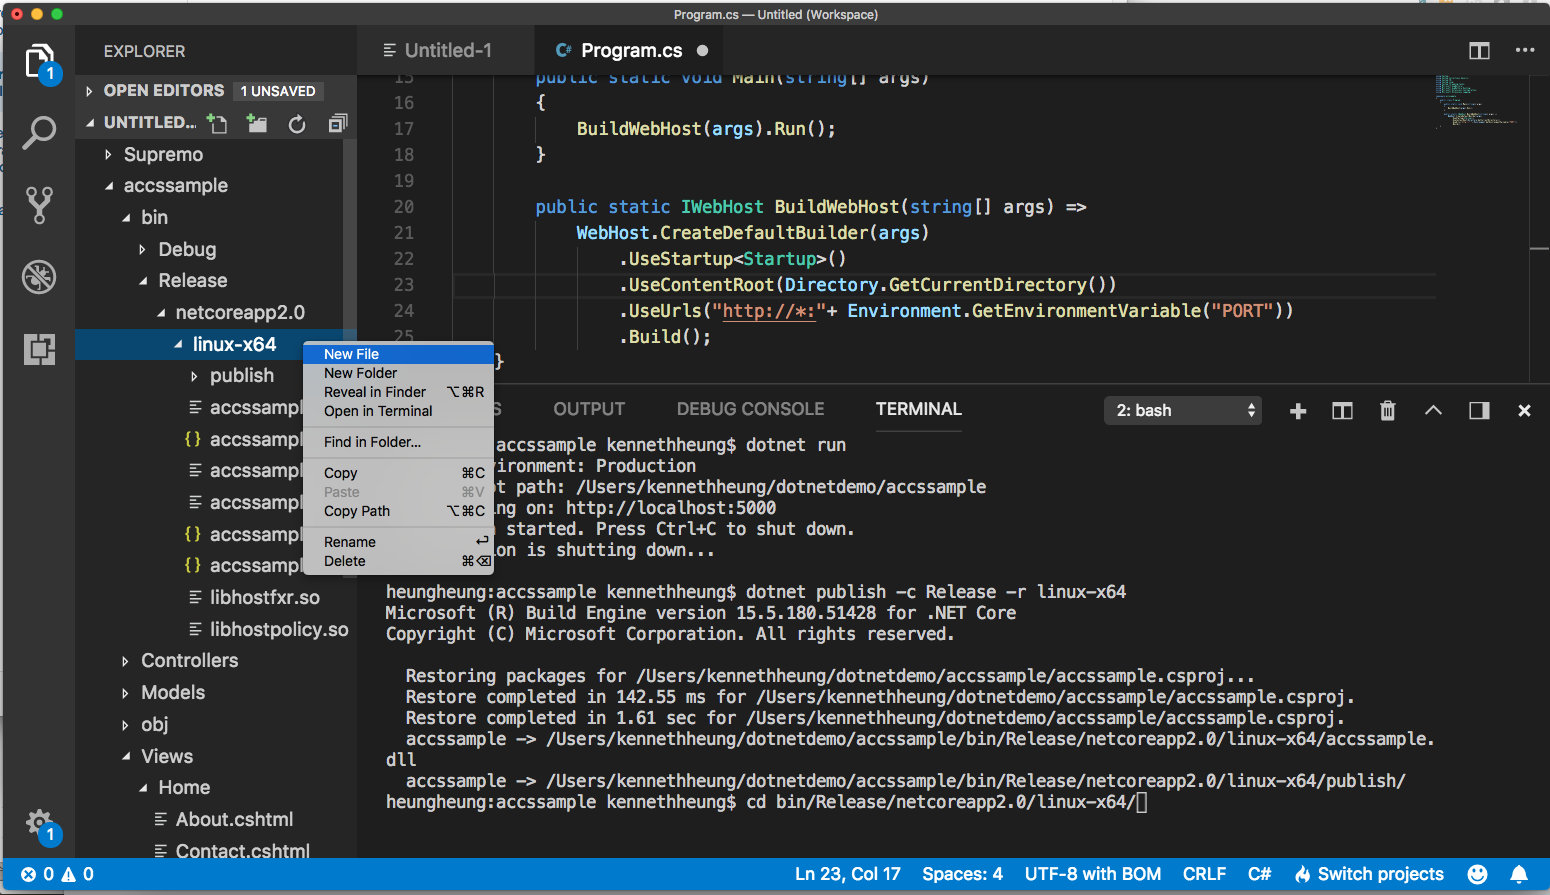
- For ACCS to start the program, we will create 2 more files in the distribution (i.e. linux-x64) folder
start.sh
manifest.json
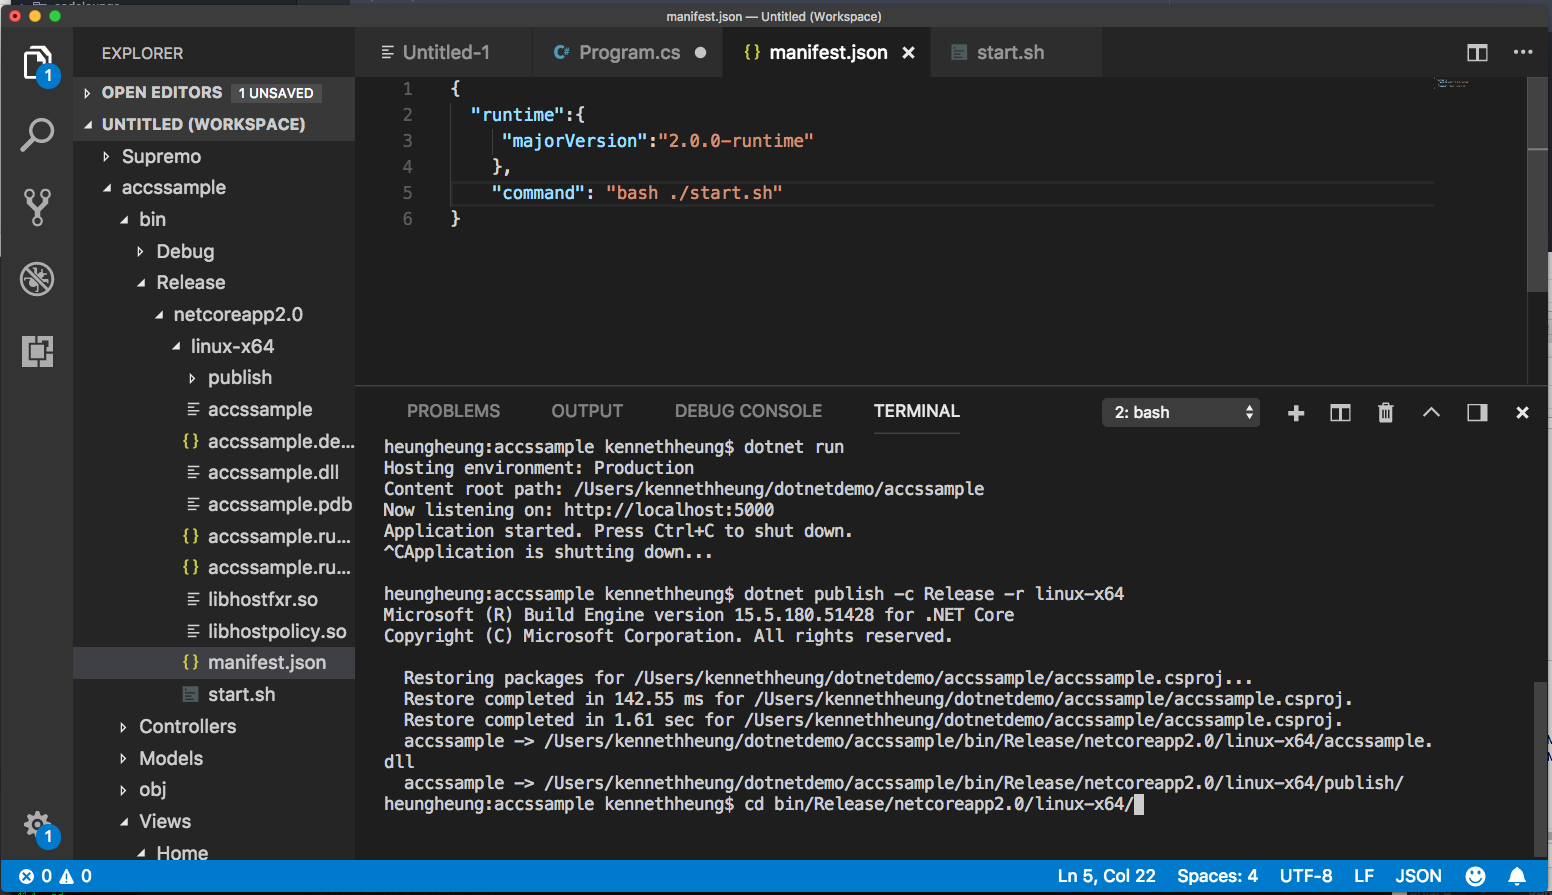
Right click the linux-x64 folder and choose new file, name the first file as manifest.json
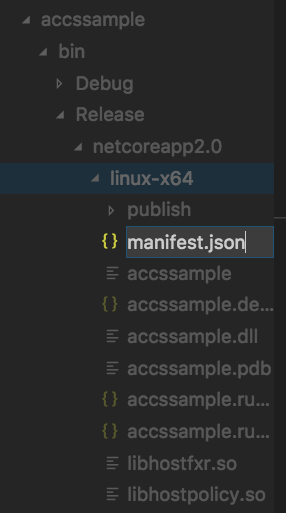
- Enter the contents of manifest and remember to save it. For more info about ACCS manifest, please refer to ACCS documentation https://docs.oracle.com/en/cloud/paas/app-container-cloud/dvcjv/creating-meta-data-files.html
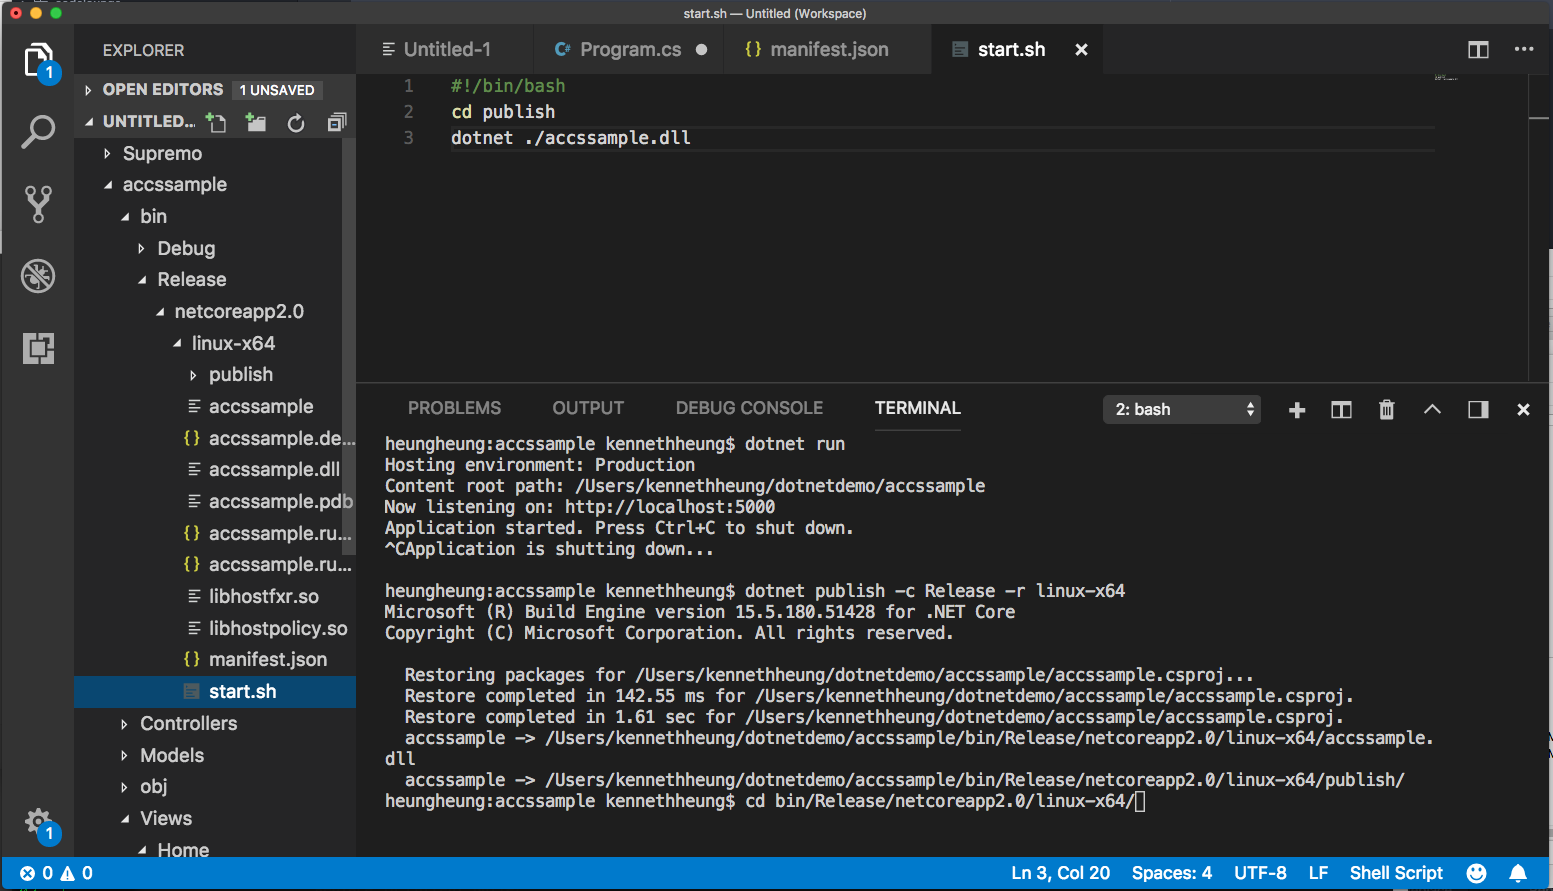
- Repeat the same for the start.sh
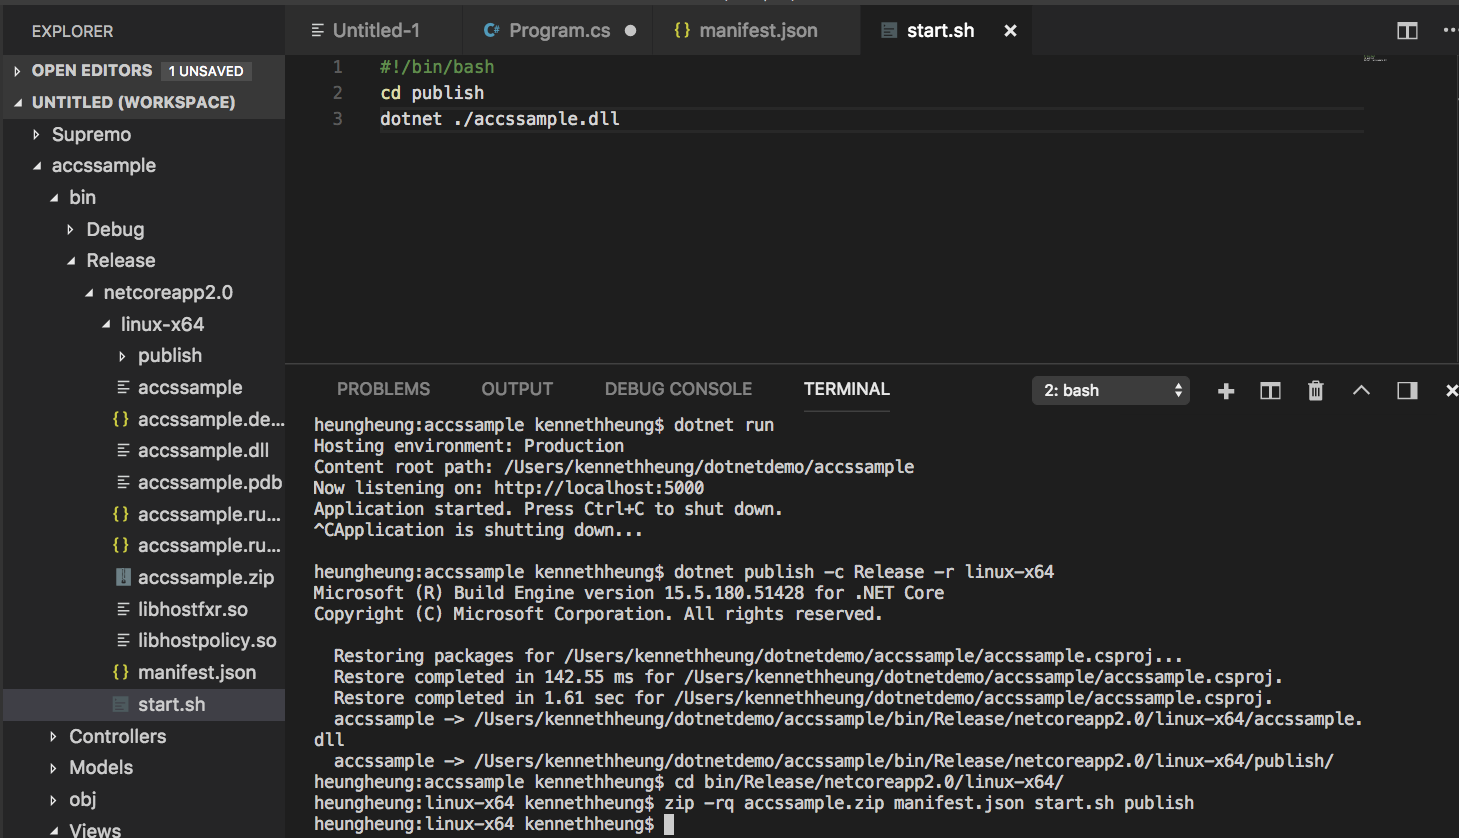
- In the terminal window, zip the release, start.sh and manifest.
cd bin/Release/netcoreapp2.0/linux-x64/
zip -rq accssample.zip manifest.json start.sh publish
- The application is now ready to deploy to ACCS. We can either use Web GUI, CLI or REST API to deploy the app.
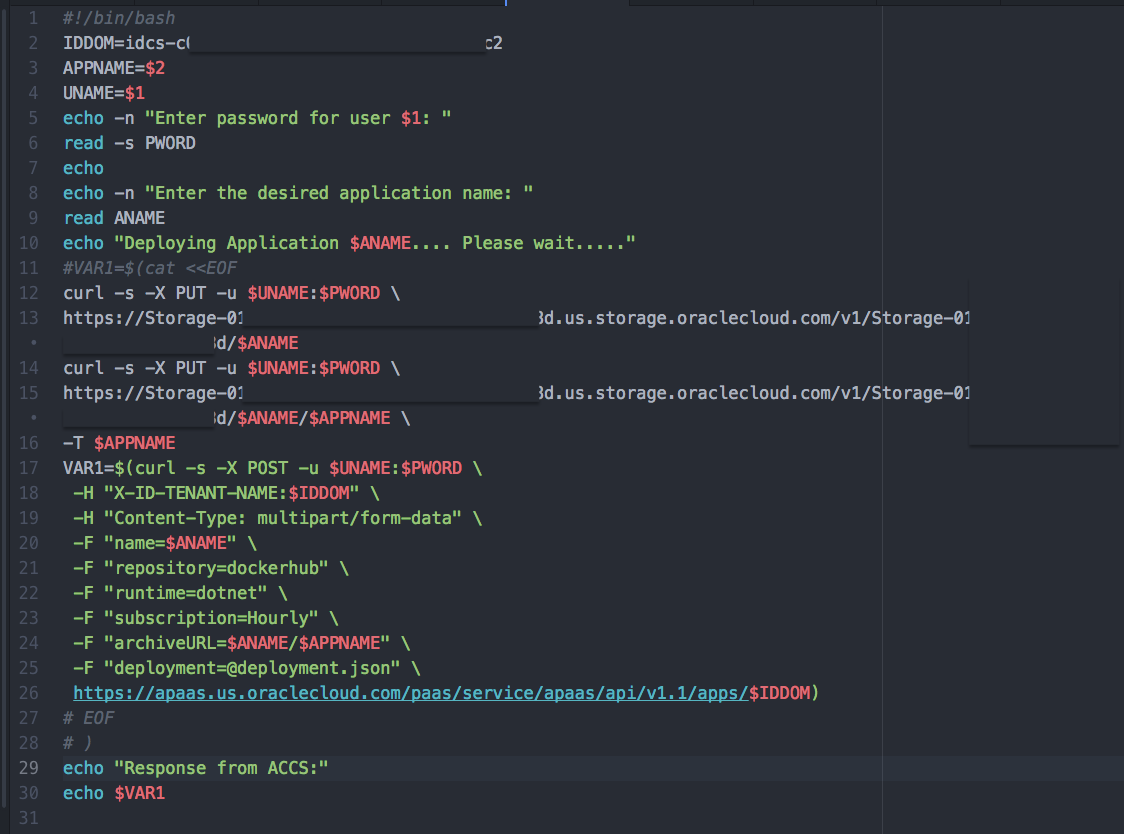
I’ve a small shell script to execute curl to send REST to deploy the app. I also have a deployment.json file to control the memory and number of instance of the app. The deployment json looks like this
{
        "memory":"1G",
        "instances":"1"
}
this is what I did to deploy the app to ACCS,
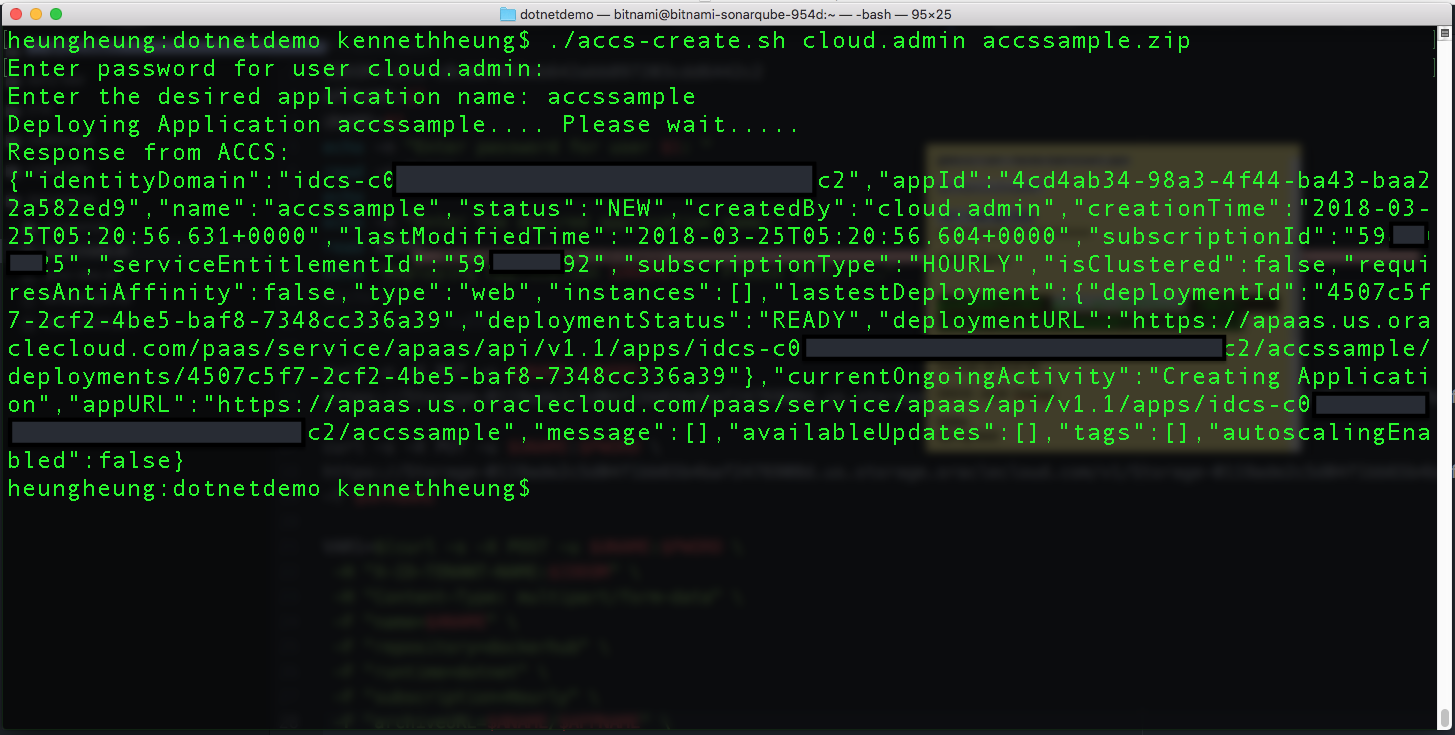
and this is what my script looks like – what I actually do is
- create a storage container
- put my the zip file in the container
- create an ACCS app from zip (in storage container)
- We can double check the application deployment from ACCS WebUI (or using CLI / REST API)
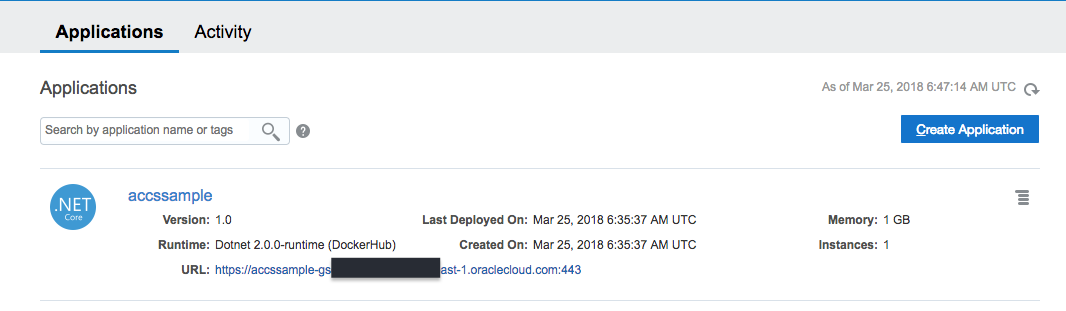
- Our sample app is now up and running in ACCS.

SonarQube with Oracle Developer Cloud
Got a question from my sales colleague whether DevCS supports SonarQube. The quick answer is “yes” and I’m going to briefly describe how to do it. I’m going to create a SonarQube VM via Bitnami in OCI Classic and scan the spring-boot example during the maven build process.
Part A – SonarQube
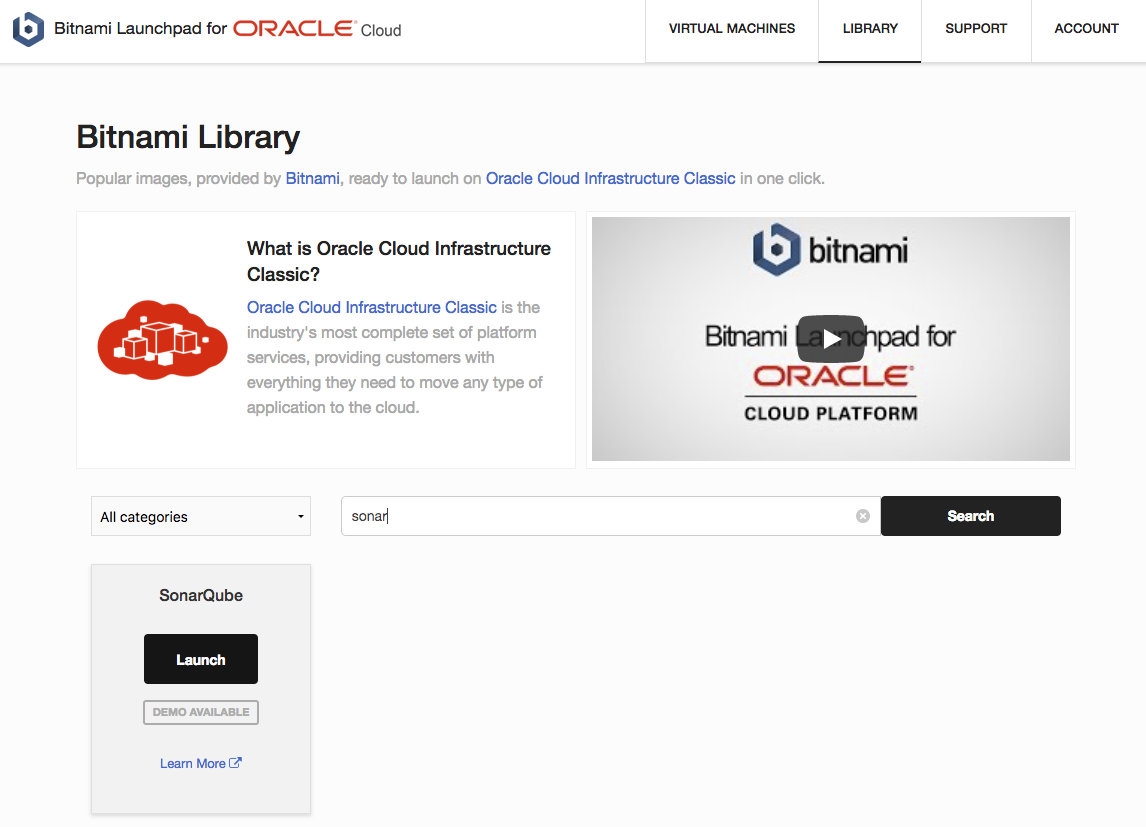
- The first step is the create the SonarQube VM in OCI Classic. Just like what we’ve talk about previously, we can use the Bitnami portal to provision the VM. Login to Bitnami and navigate to the Launchpad for Oracle Cloud.
Go to the Library tab and search for SonarQube. Click the Lauch button to create the VM.
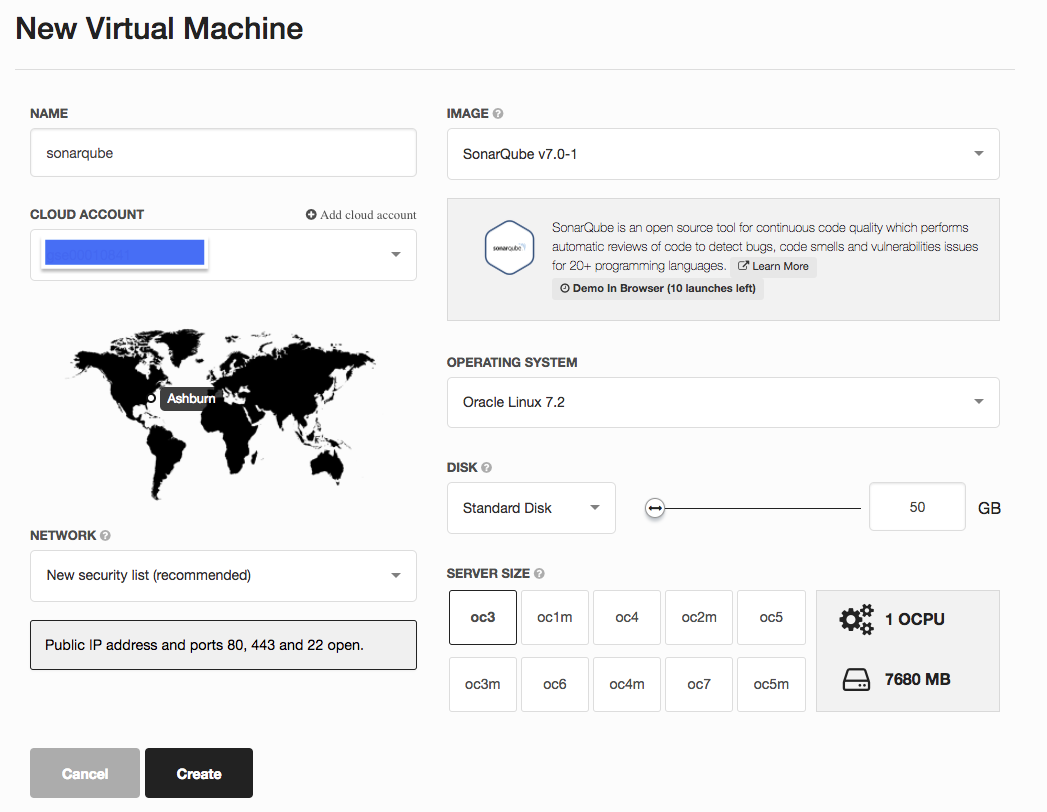
- Pick the corresponding OCI Classic Cloud Account, please refer the previous post about the details of setting up Cloud Account in Bitnami. Choose the desired disk size and server size. In this example, we will use Oracle Linux as the OS of the VM. When ready, just click to Create button.
- Wait for a while for your VM to get provisioned. In the provision screen, you can get the login information (username/password) of SonarQube, as well as the SSH key to access the VM.
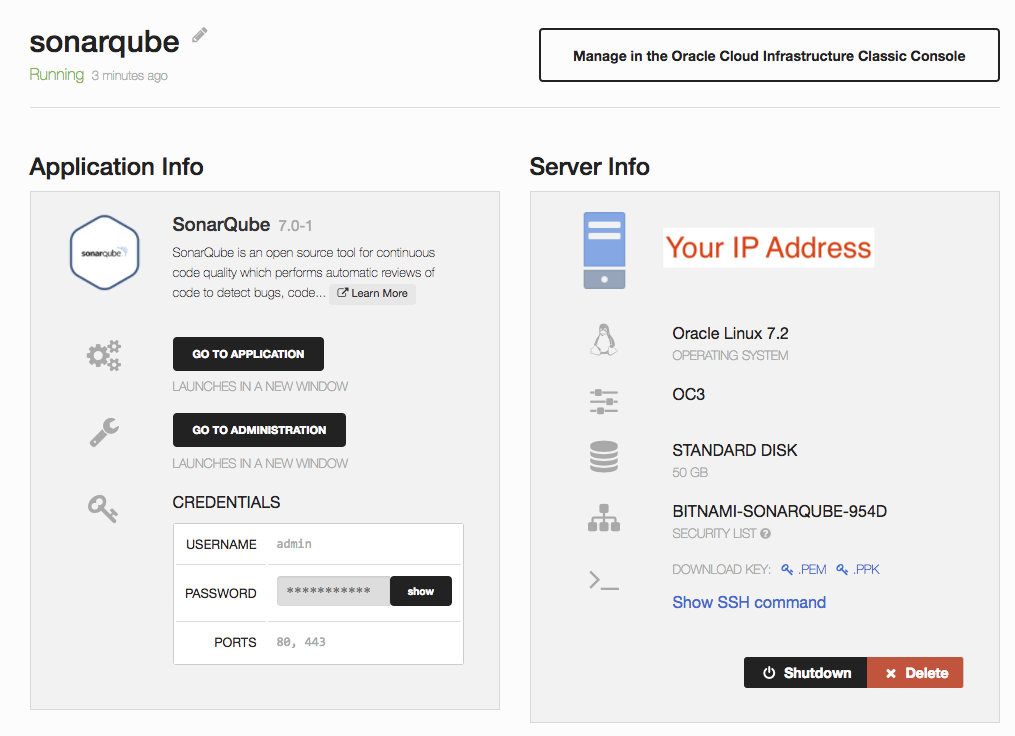
- Once SonarQube is ready, you can either
- click the [GO TO APPLICATION] button
- manually use a browser to navigate to http[s]://[ip-address-of-vm]
to access SonarQube (web interface).
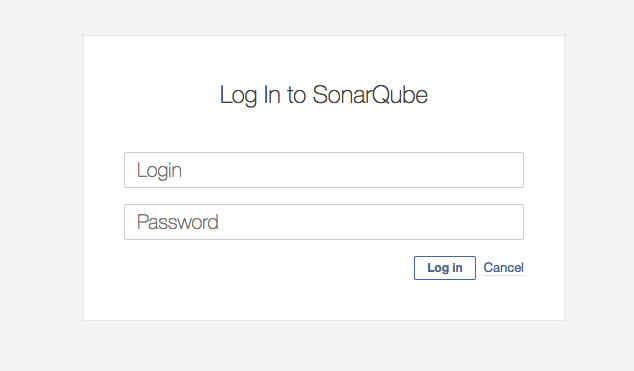
- Login SonarQube with credential you got in the previous step (i.e. default username is admin)
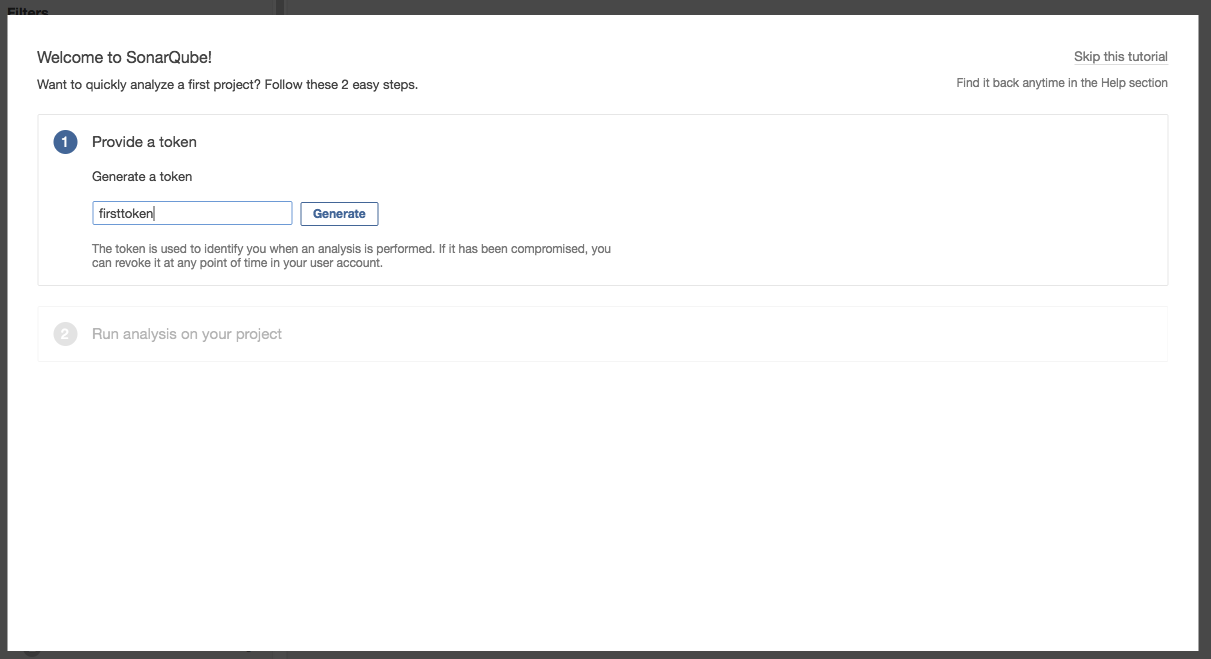
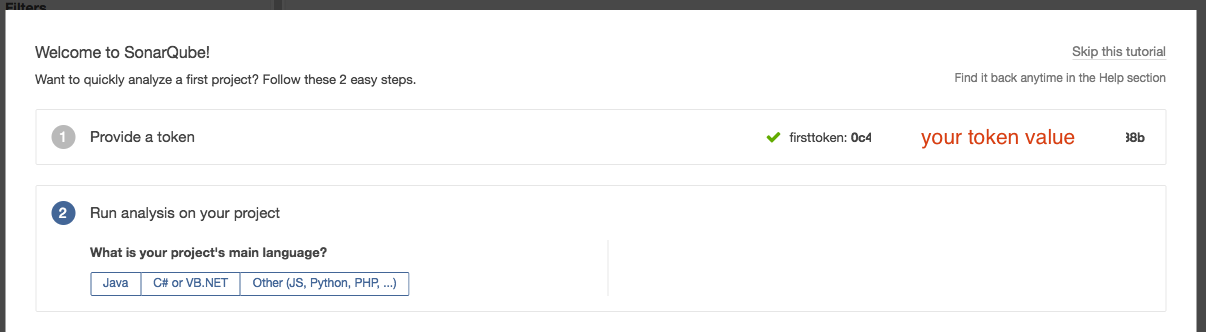
- The first time you access SonarQube, the tutorial / wizard will guide you through some initial steps. We will to create a token (for details of using SonarQube, you can visit their website).
Provide a name for the token and click [Generate]
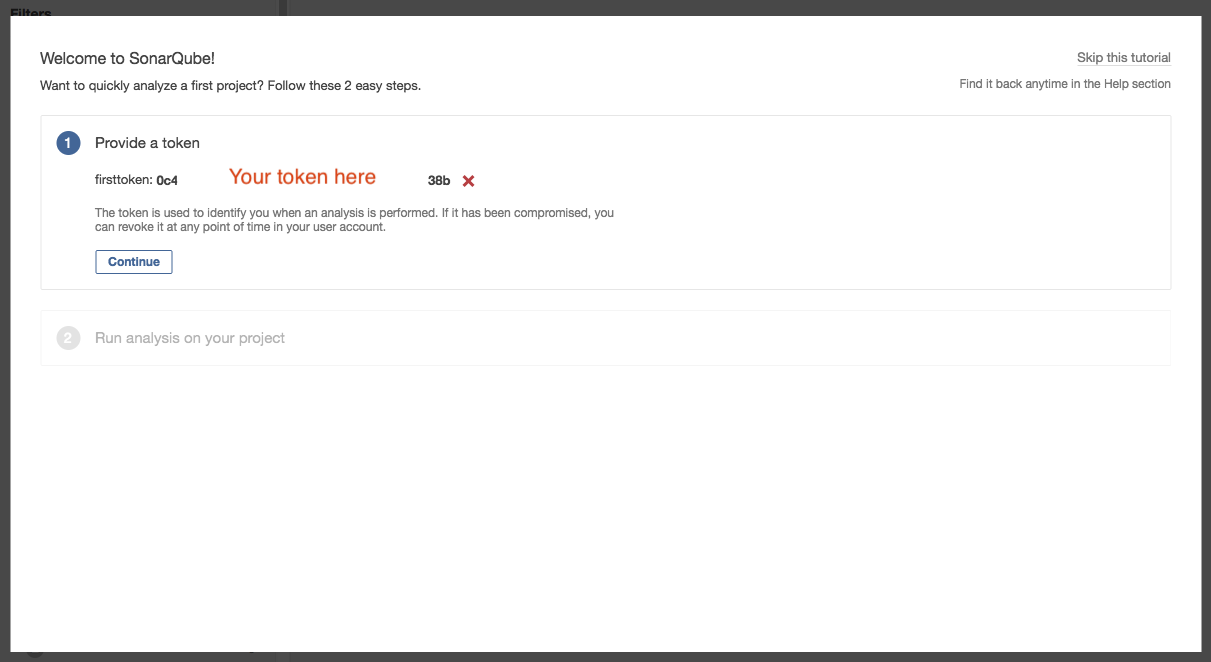
Copy the token value, as you will need it for your maven step. When ready, click [Continue]
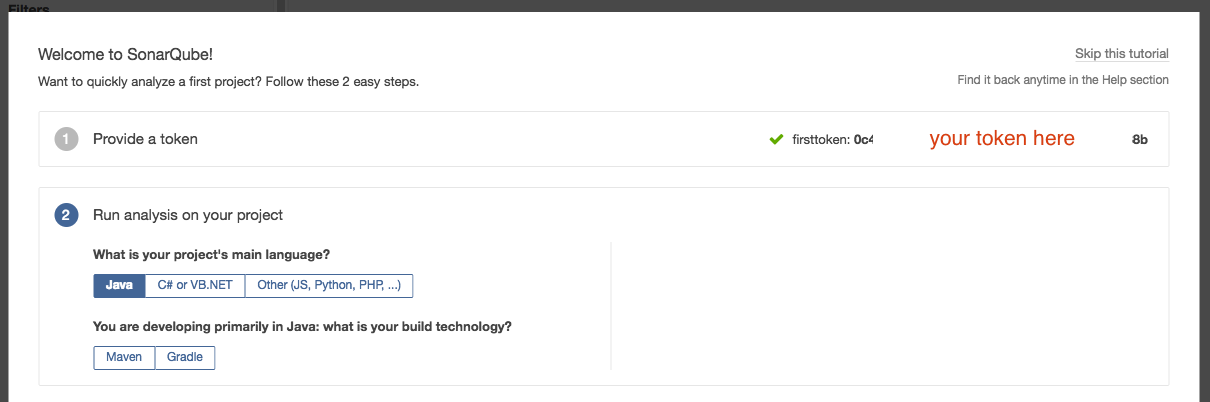
- It will then ask which programming language you need to scan. In our example, we will just click [Java].
For Java, we can select whether we use maven or gradle for the build process. For our example, we will use maven.
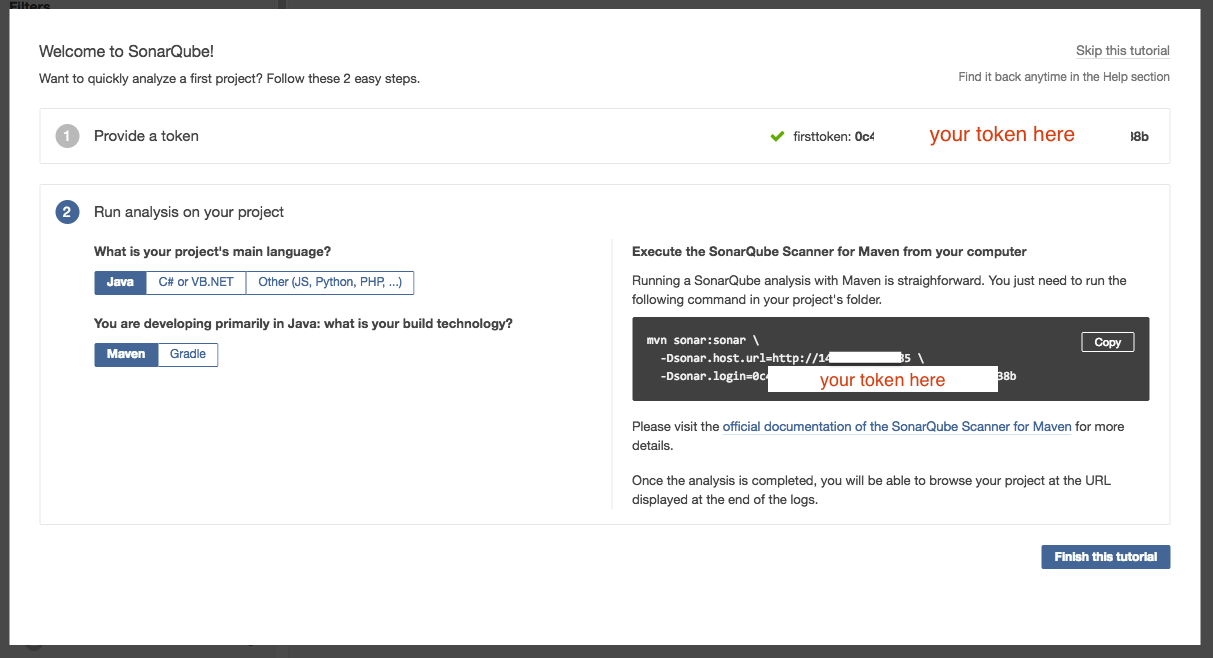
The required mvn command will be displayed in the right hand side (you can also copy this command for future reference). Click [Finish this tutorial]
Part B – Developer Cloud
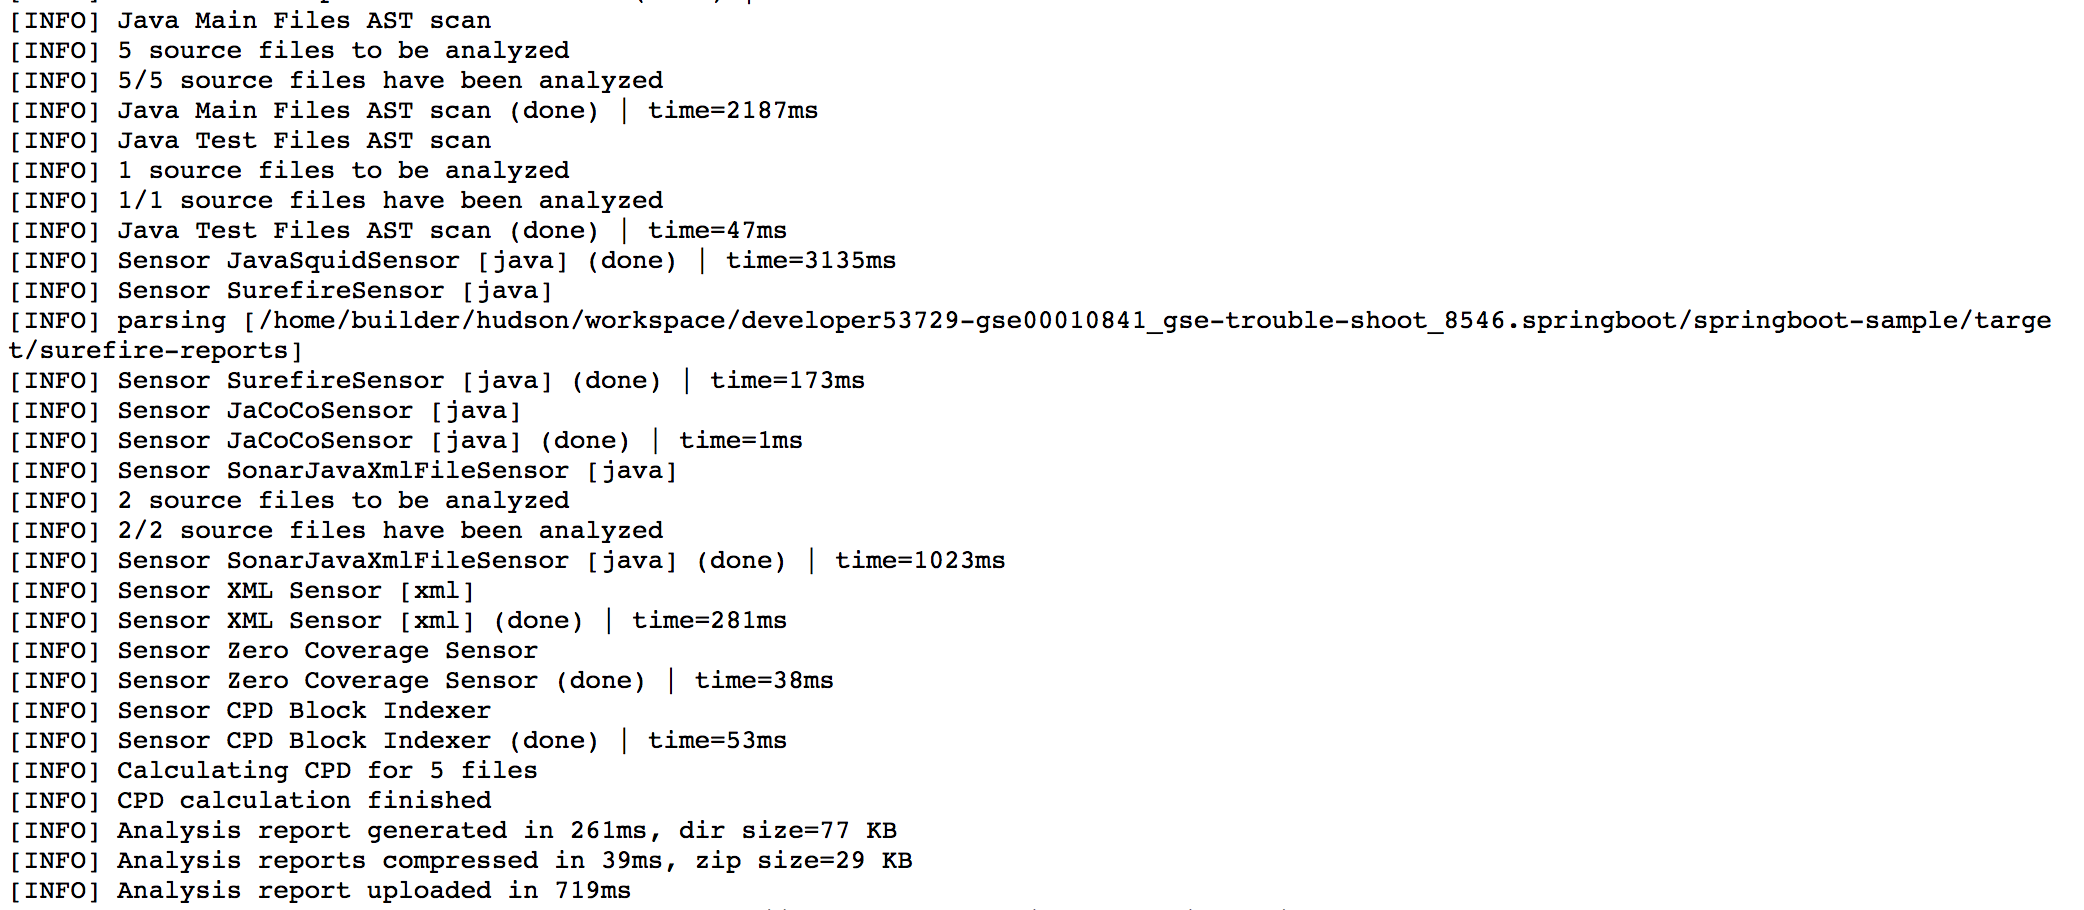
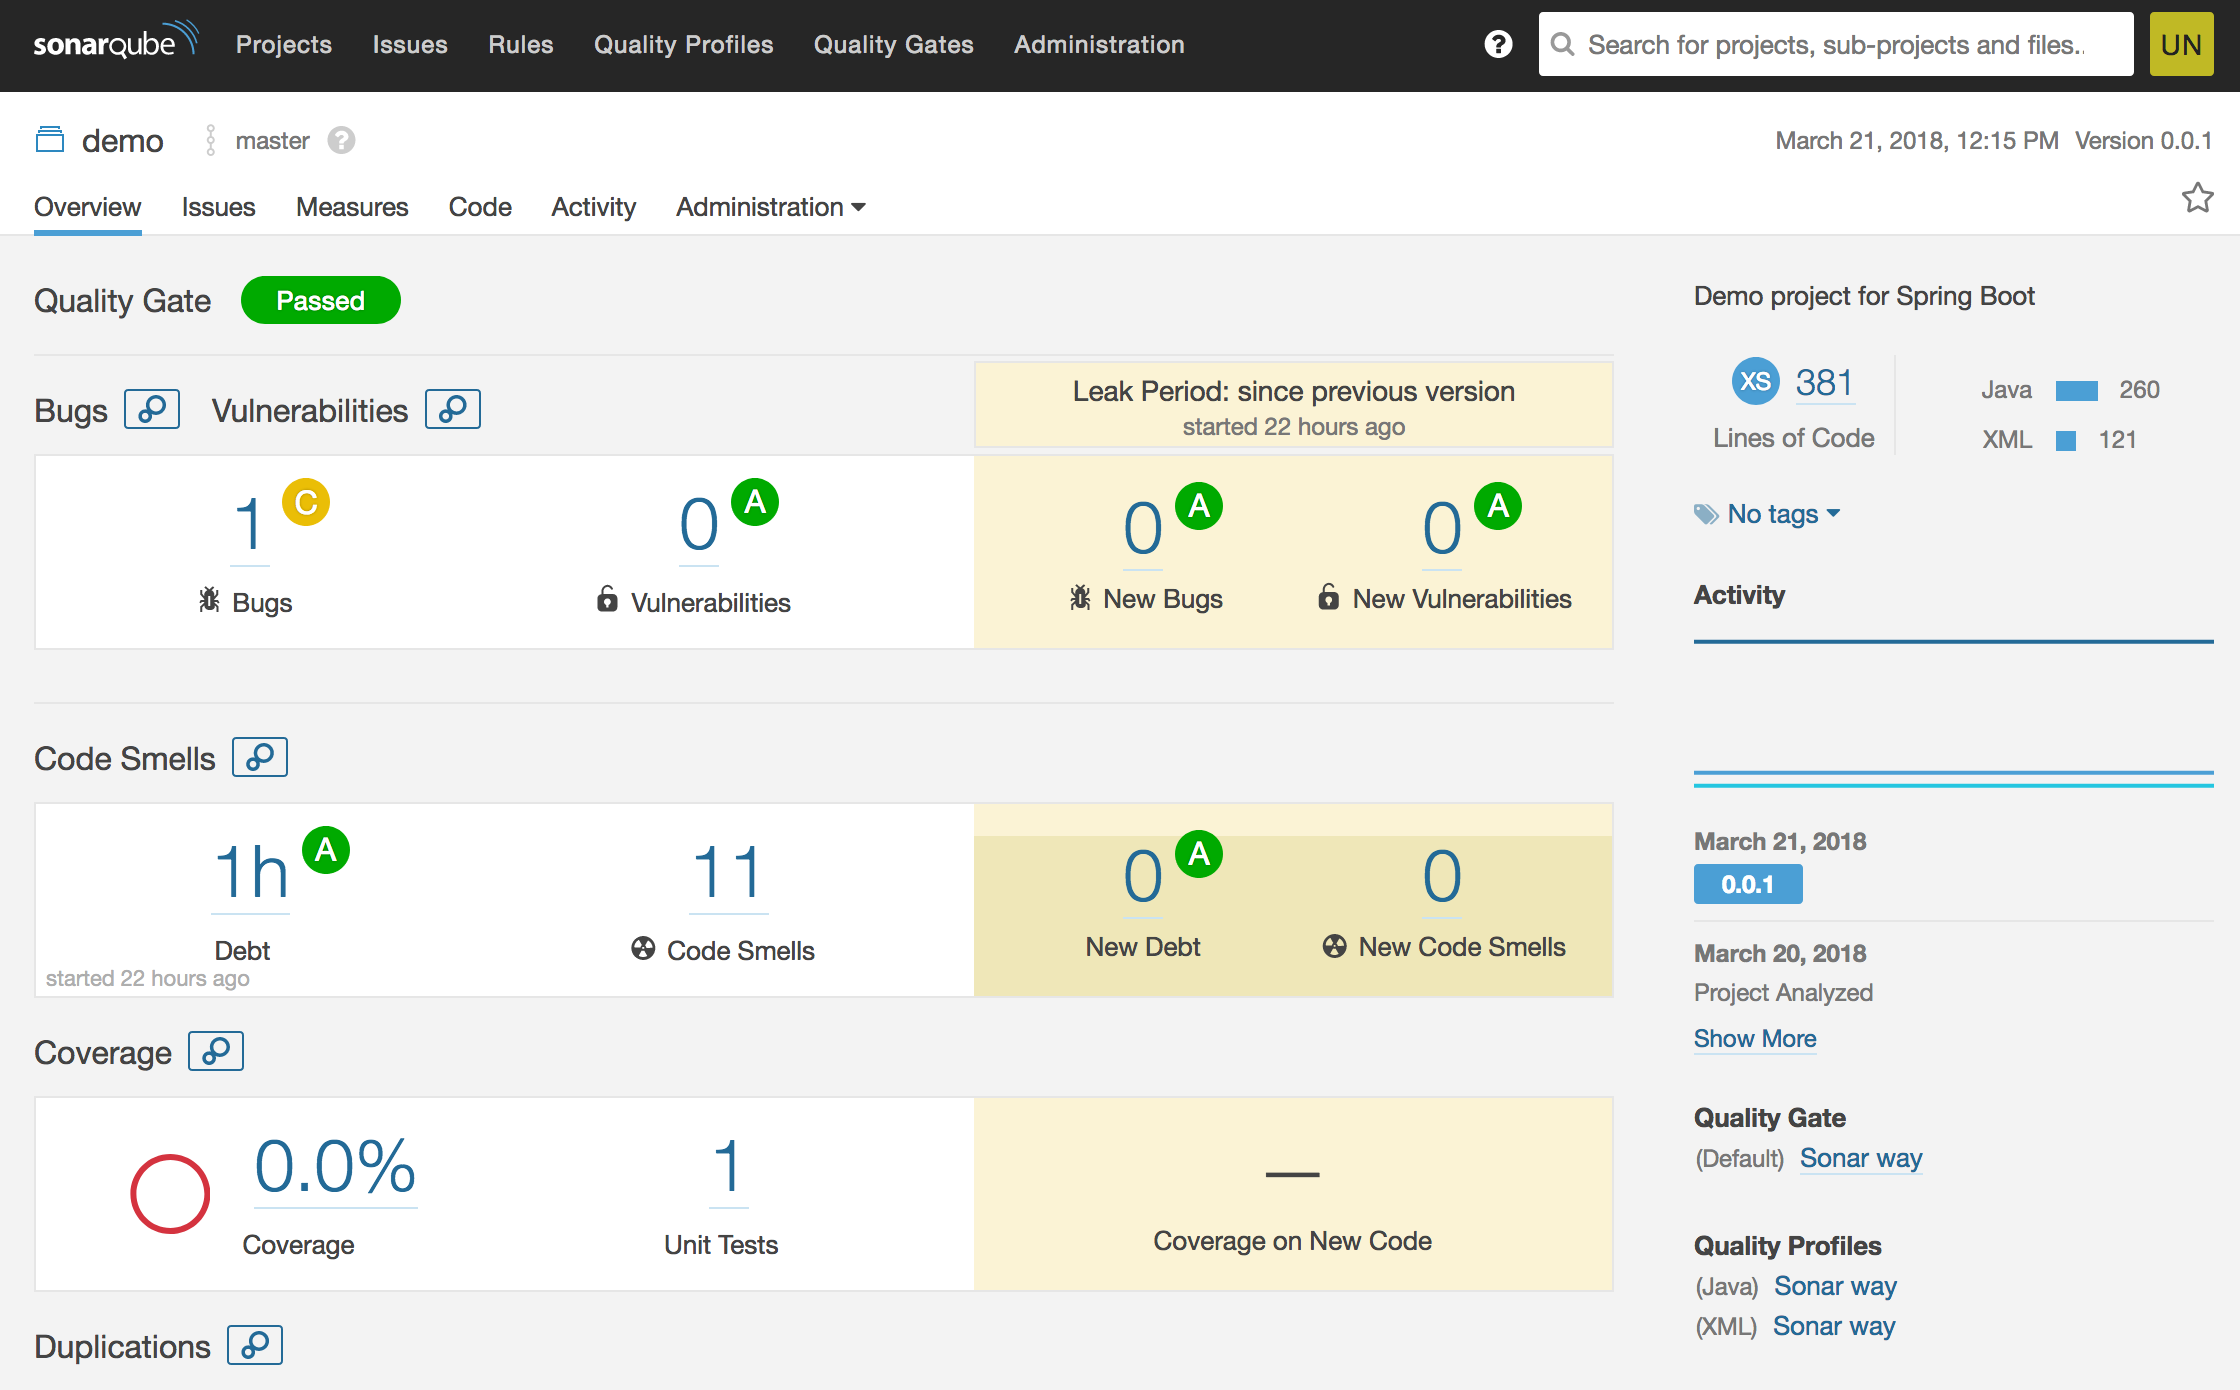
8. In our build job, we will need to add sonar:sonar as part of the maven goal. We will also need to provide the sonar server url and token we got in part A. When the build executes, this maven step will post the project source code to SonarQube for code scan.

- Here comes the sample (console) output of the build step – the snippet of code being scanned.
- You should be able to view the scan report in SonarQube
Your Future Today. With Cloud-Native Apps.
Cloud-native to reduce time to market for new projects, boost responsiveness to demand, innovate faster, improve ROI in IT, manage operations and data security efficiently. Discover how:

Your Future Today. With Cloud-Native Apps.
Time to shift your application development to the cloud? Here are Top 5 business reasons to do it.
Jenkins on Oracle BMCS
Last time, I posted the installation of GitLab. So, we have the Git…. what’s next?
A lot of people suggest CI – continuous integration. Thus, I’m going to talk about Jenkins in this post.
ASSUMPTION / PREREQUISITE:
- we have a BMCS subscription
- we already create a Linux VM or BM, have the VCN and Internet Gateway setup
We can put Jenkins in the same VM/BM as GitLab, or we can use another VM to run Jenkins.
Steps
- Similar to GitLab, the first step here is to get the Jenkins installation binary. We can navigate to Oracle Cloud Marketplace
https://cloudmarketplace.oracle.com/marketplace/en_US/listing/16132843
for details
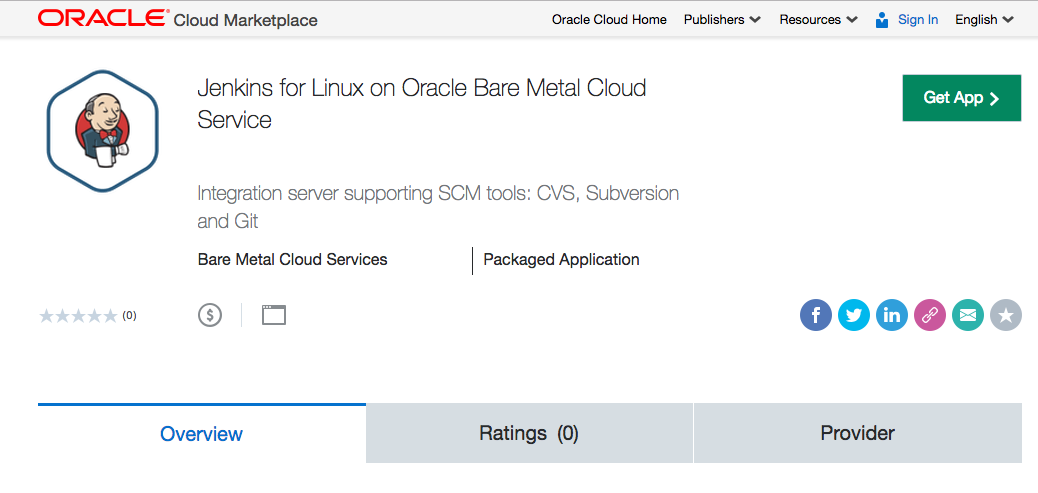
- Just click the [Get App>] button and follow the instruction. It will guide us throughout the Jenkins installation process.
- Actually, what we need to do is to ssh to the VM/BM to download and install Jenkins. In the VM/BM use wget to download Jenkins.

- The download will take a while. wait for the download to complete. Then change the file permission to so that we can run the installer.

- In our example, we will install Jenkins in the same VM/BM as GitLab. We will use non-privilliged port to run Jenkins and run it with oracle user.

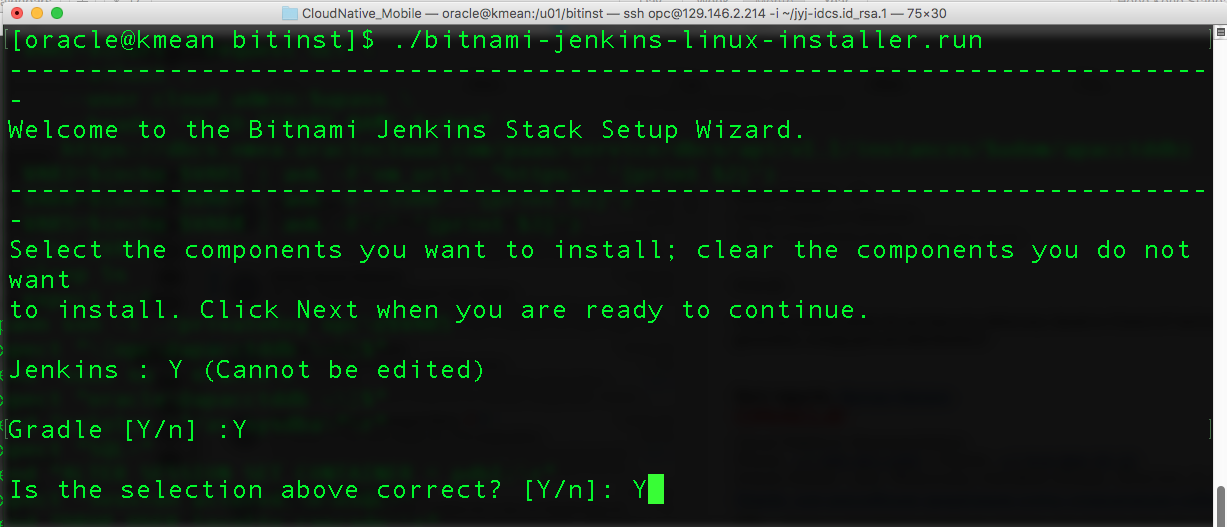
- The installer will install Gradle along with Jenkins.
– Answer [Y] and press [Enter] when it ask for Gradle.
– Answer [Y] and press [Enter] when it ask you to confirm.
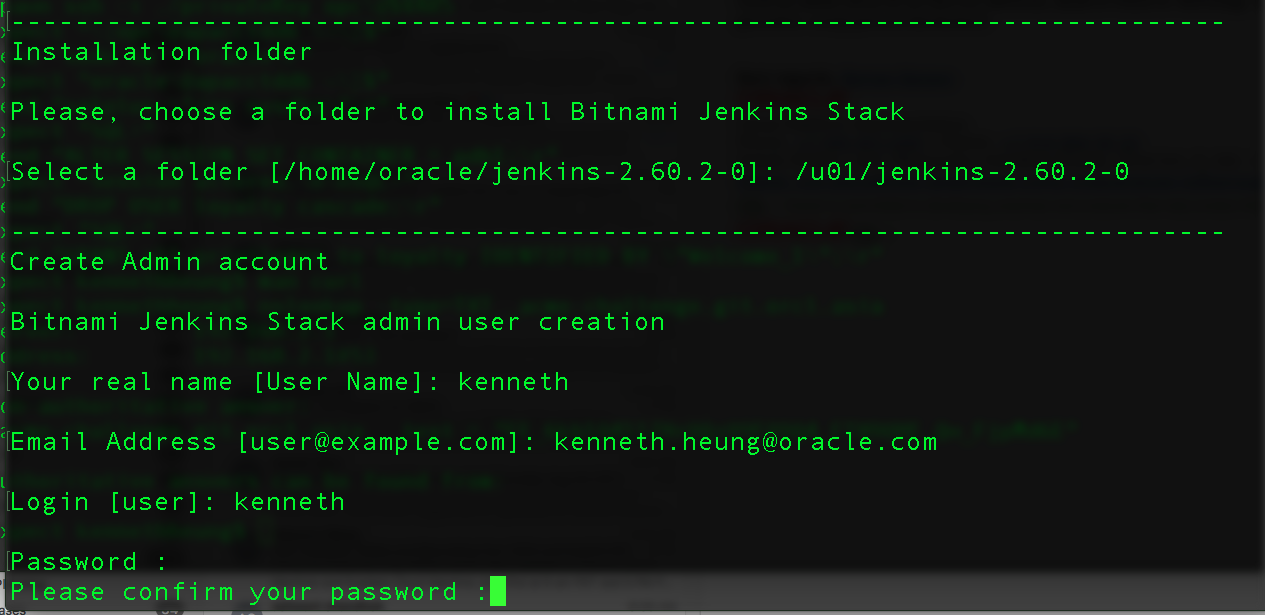
- Next, the installer will prompt you for installation folder. Enter your desired folder. In our example, we will put it under /u01

- Enter your desired Jenkins SUPER ADMINISTRATION username and password
- The installer will then ask you for Apache and Tomcat port to be used for Jenkins. You can just keep the default values.
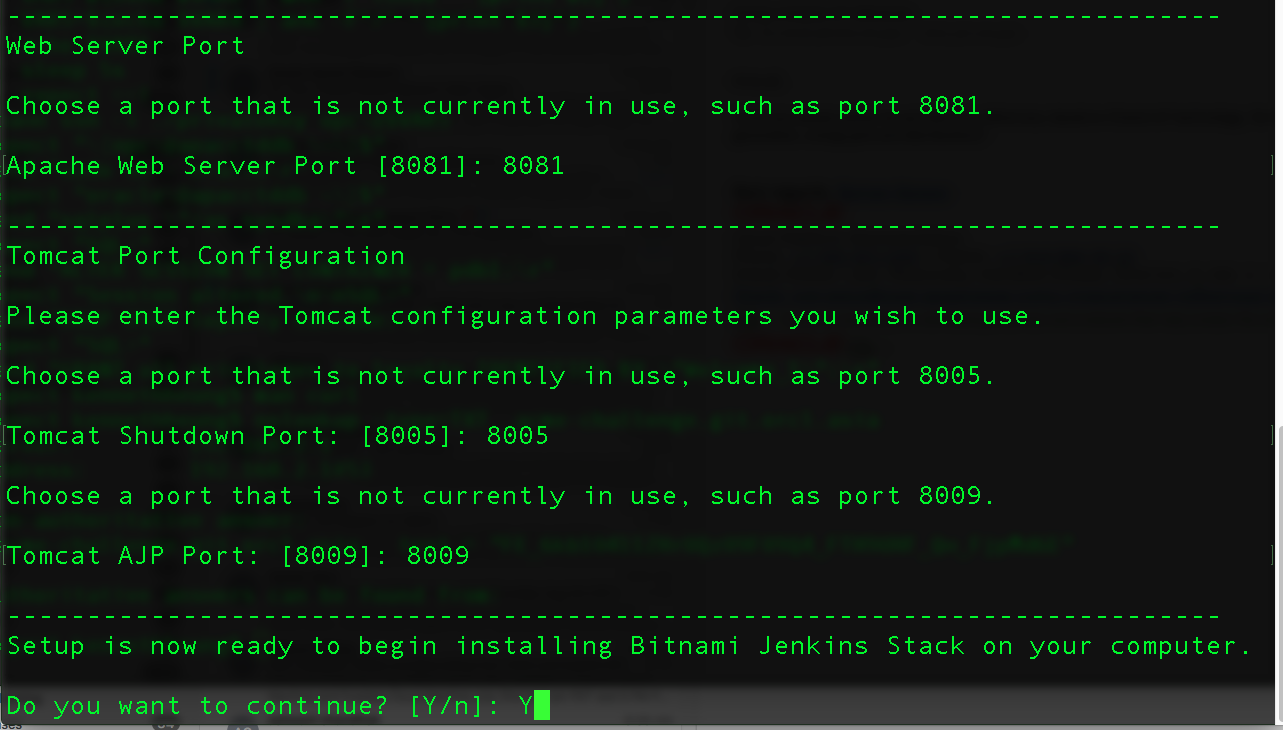
- Enter [Y] for the last confirmation and wait for the installation to complete.
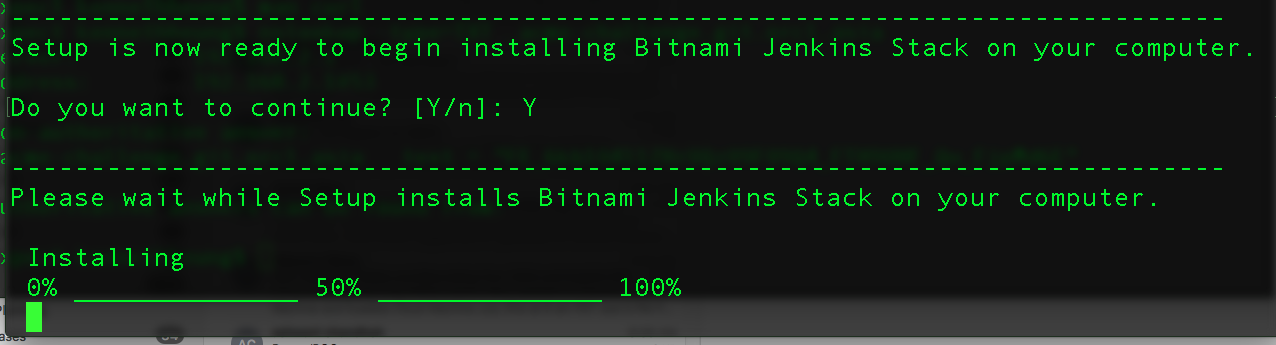
- Jenkins should starts automatically after the installation.
How to start / stop / restart Jenkins
Just navigate to the target folder and use the ctlcscript, e.g.
[oracle@kmean jenkins-2.60.2-0]$ ./ctlscripts.sh start
or
[oracle@kmean jenkins-2.60.2-0]$ ./ctlscripts.sh stop

How to access / navigate / login to Jenkins
It is simple, just use a browser and go to
http://your-vm-bm-ip-fqdn:apache-port/
e.g. http://jenkins.mydomain.com:8080/

Click the [Access Jenkins] link and login with the username/password we’ve entered during installation.
Oracle Code Online June 21st @09:30 IST
Register to Oracle Code Online for technical demonstrations and presentations from community advocates, Oracle ACEs, Product Leads and Java Champions. You will be able to chat instantaneously with any questions or comments about the presentation.

Oracle Code Online June 21st @09:30 IST
Register to our online event for technical demonstrations and presentations from community advocates, Oracle ACEs, Product Leads and Java Champions. You will be able to chat instantaneously with any questions or comments about the presentation.
